

🚴♂️ Shield Your Ride, Elevate Your Style!
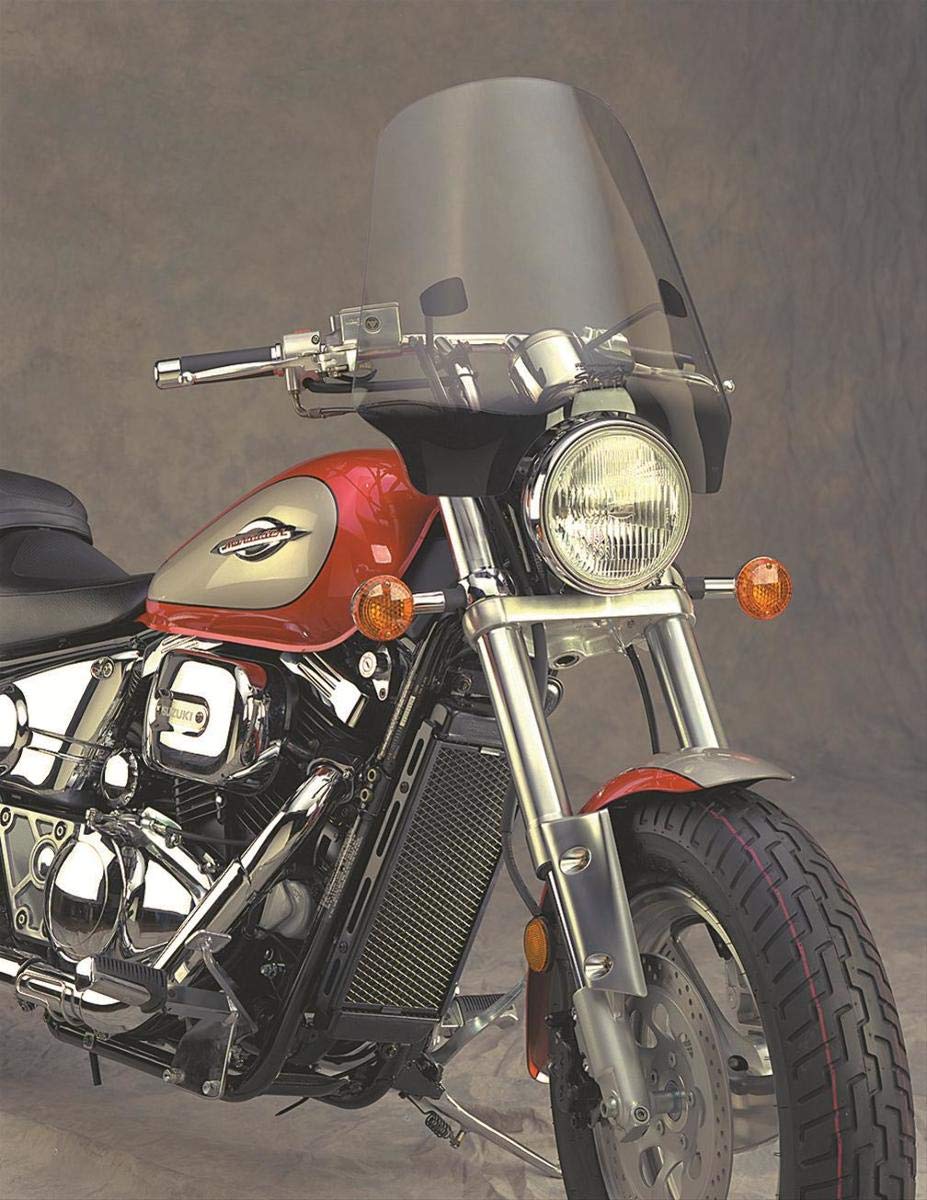
The National CycleLight Tint Street Shield EX is a premium motorcycle windscreen designed for 1 in. handlebars, featuring a No-Hole Ballsocket™ 4-point mount system for easy installation, an impressive 18.50” screen height for optimal protection, and a QuickSet™ hardware kit for hassle-free removal and attachment.
J**R
Great for Yamaha V Star 250 and other bikes! You need the 1" size for 2012 V Star 250 and above!
Nice sized shield and very adaptable to different handle bar types. Based on this install, I would say if you are looking at windshields for a Yamaha V Star 250 or similar bike, a windshield size of 18" to 21" High by 20" to 26" wide is best. Go with a taller shield if you are a taller rider and want the wind to deflect above your head while riding and reduce buffeting. I am 5'-11" and found this size good for my height, but did have to fine tune the angle and height after installing it. I was looking for a good quality lower cost shield for my 2012 V Star 250. Most other shields I looked at were not quick release for easier cleaning, and cost more. As others have said, read the instructions thoroughly and view the Youtube video another posted here. Then, get ready to spend at least +2 hours on installing.Most of that time is spent "dry" fitting the shield with the clamps and hardware just finger tightened on the handle bars and forks. I found that NOT snapping the mounting rods into the wind shield for the dry fit worked well. I just aligned them with the sockets on the windshield so I could have more flexibility to make fine adjustments. It is just too difficult if the rods are already fastened onto the windshield.Some install tips: 1. For a Yamaha V Star 250 2012 and above, you need the 1" mounting clamp model because the upper clamps need to be mounted on the handle bar RISERs and not the handle bars themselves as in earlier models or bikes with ape type bars.2. Use the longer (larger) fork mounting bands as the smaller ones will not fit very well if at all. The install kit supplies both kinds.( Optional)I shortened the larger fork mounting bands about 1 3/4" by bending back and forth with a pliers till the piece I wanted to remove snapped off. Then I finished it by taking it to my bench grinder and restored the broken off end by copying the original end of the piece I removed. It worked very well and was then the right size with no excess mounting clamp left sticking out.3. I cut off about 2 1/2" of the lower mounting rods after my "dry fitting" revealed they were a bit too long for the V Star 250 and similar bikes. I then fine finished the cut off ends on my bench grinder and touched up the bare metal with a small artists brush and satin black epoxy paint I had.4. After the "dry fit" seems proper, cut off any excess length of the lower mounting rods as I stated if you wish, THEN snap the rods into the windshield by placing the shield down on some carpeting and pushing the ball ends of the rods one at a time into the sockets on the windshield.5. You will want to adjust the windshield to have the approximate same angle as your front wheel forks. This is easily done by eyeballing the side edge of the windshield after it is mounted. Also, you will have to fine tune height for the least amount of wind buffeting by taking some test rides. I was able to do this after only one test ride and tweaking both the height and angle a bit. If you have set the right angle, the top of the windshield should be about chin or nose height when you are seated on the bike. All in all, this is about the best shield I could find for the money. I could have spent $300 or more and maybe gotten a better shield , but I found none with quick release mounts for less then $300 to $350.
J**T
Great Price For A Windshield
This windshield replaces an older National Cycle model that was 3 inches shorter. The additional 3 inches in height are an improvement.I installed the Street Shield EX on a 2012 VStar 950.It does fit but.... The instructions are next to worthless! Hence the 1 star deduction on an otherwise excellent product.This shield differs from the Deflector screen in that besides being taller, the Street Shield EX has 4 mounting points instead of 2.The handlebar mounts are the same. What is different is that hose clamps are used to mount the bottom of the screen to the top of the forks. Makes for a stable windshield.This screen is also easy to detach quickly.I normally avoid any tinted screens or shields. Surprisingly, I like the tinting a lot! It does not effect visibility much at all.Installation would have been much easier and less time-consuming with better instructions.I found that I needed to tweak or adjust the windshield a few times to get it where it should be. That is an easy task with an open-end wrench and the Allen wrench that was provided.Overall I would buy it again. Just beware that if you don't have experience installing these types of screens the instructions will be of little help.
M**N
I really like this windshield, but the installation instructions are really bad!
I really like this windshield, but the installation instructions are really bad! Fortunately there is a youtube video that helps a lot! (Amazon won't let me post a link, sorry.) If you have 1 1/4" bars like mine you will need a special hardware kit that is available on Amazon, but nowhere else including National's site for some reason. The negatives aside, this is a solid product that looks great and will do the job for me. I do not like the look of big windshields on my bike and this one works to cut the wind down and deflect the bugs, but it isn't cosmetically overbearing. Add to that the fact that it is quick and easy to take off if I don't want it for a short ride.
D**R
Very happy with this purchase!
Bought this for my dads 2014 Triumph Speedmaster. He absolutely loves it! Installation was pretty straight forward, but I do build and install stuff for a living. Expect there to be some adjusting and when it comes to snapping the arms to the ball socket on the windshield, put the windshield on a towel because it does require a quite a bit of pressure to snap it in. I should have took some pictures before he put it in storage. At first we put it about a half inch above the headlight with the same angle as the forks and it looked very sleek and natural, but it did not provide the old man with enough wind protection(hes 70) so we tilted it up and gained a few inches and he is now extremely pleased! It doesn't look as sleek but still looks sporty and natural. All in all it took us about 3 hours, which included, test fitting, installing, initial adjustment, a short ride by each of us, re-adjusting, followed by another short ride by both of us, then final inspection.** During install we did find it necessary to cut some of the lower arm off. You may be able to mount it in a way that it wont interfere with the steering by hitting the tank, but we like were we mounted it best.***Quality it excellent, windshield itself is sturdy and when mounted feels nice and solid. Nice little system,
Trustpilot
2 weeks ago
2 months ago