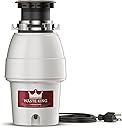
Desertcart purchases this item on your behalf and handles shipping, customs, and support to Finland.
♻️ Waste King Legend: The powerhouse your kitchen deserves, grinding waste with speed and style!
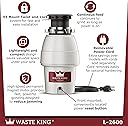
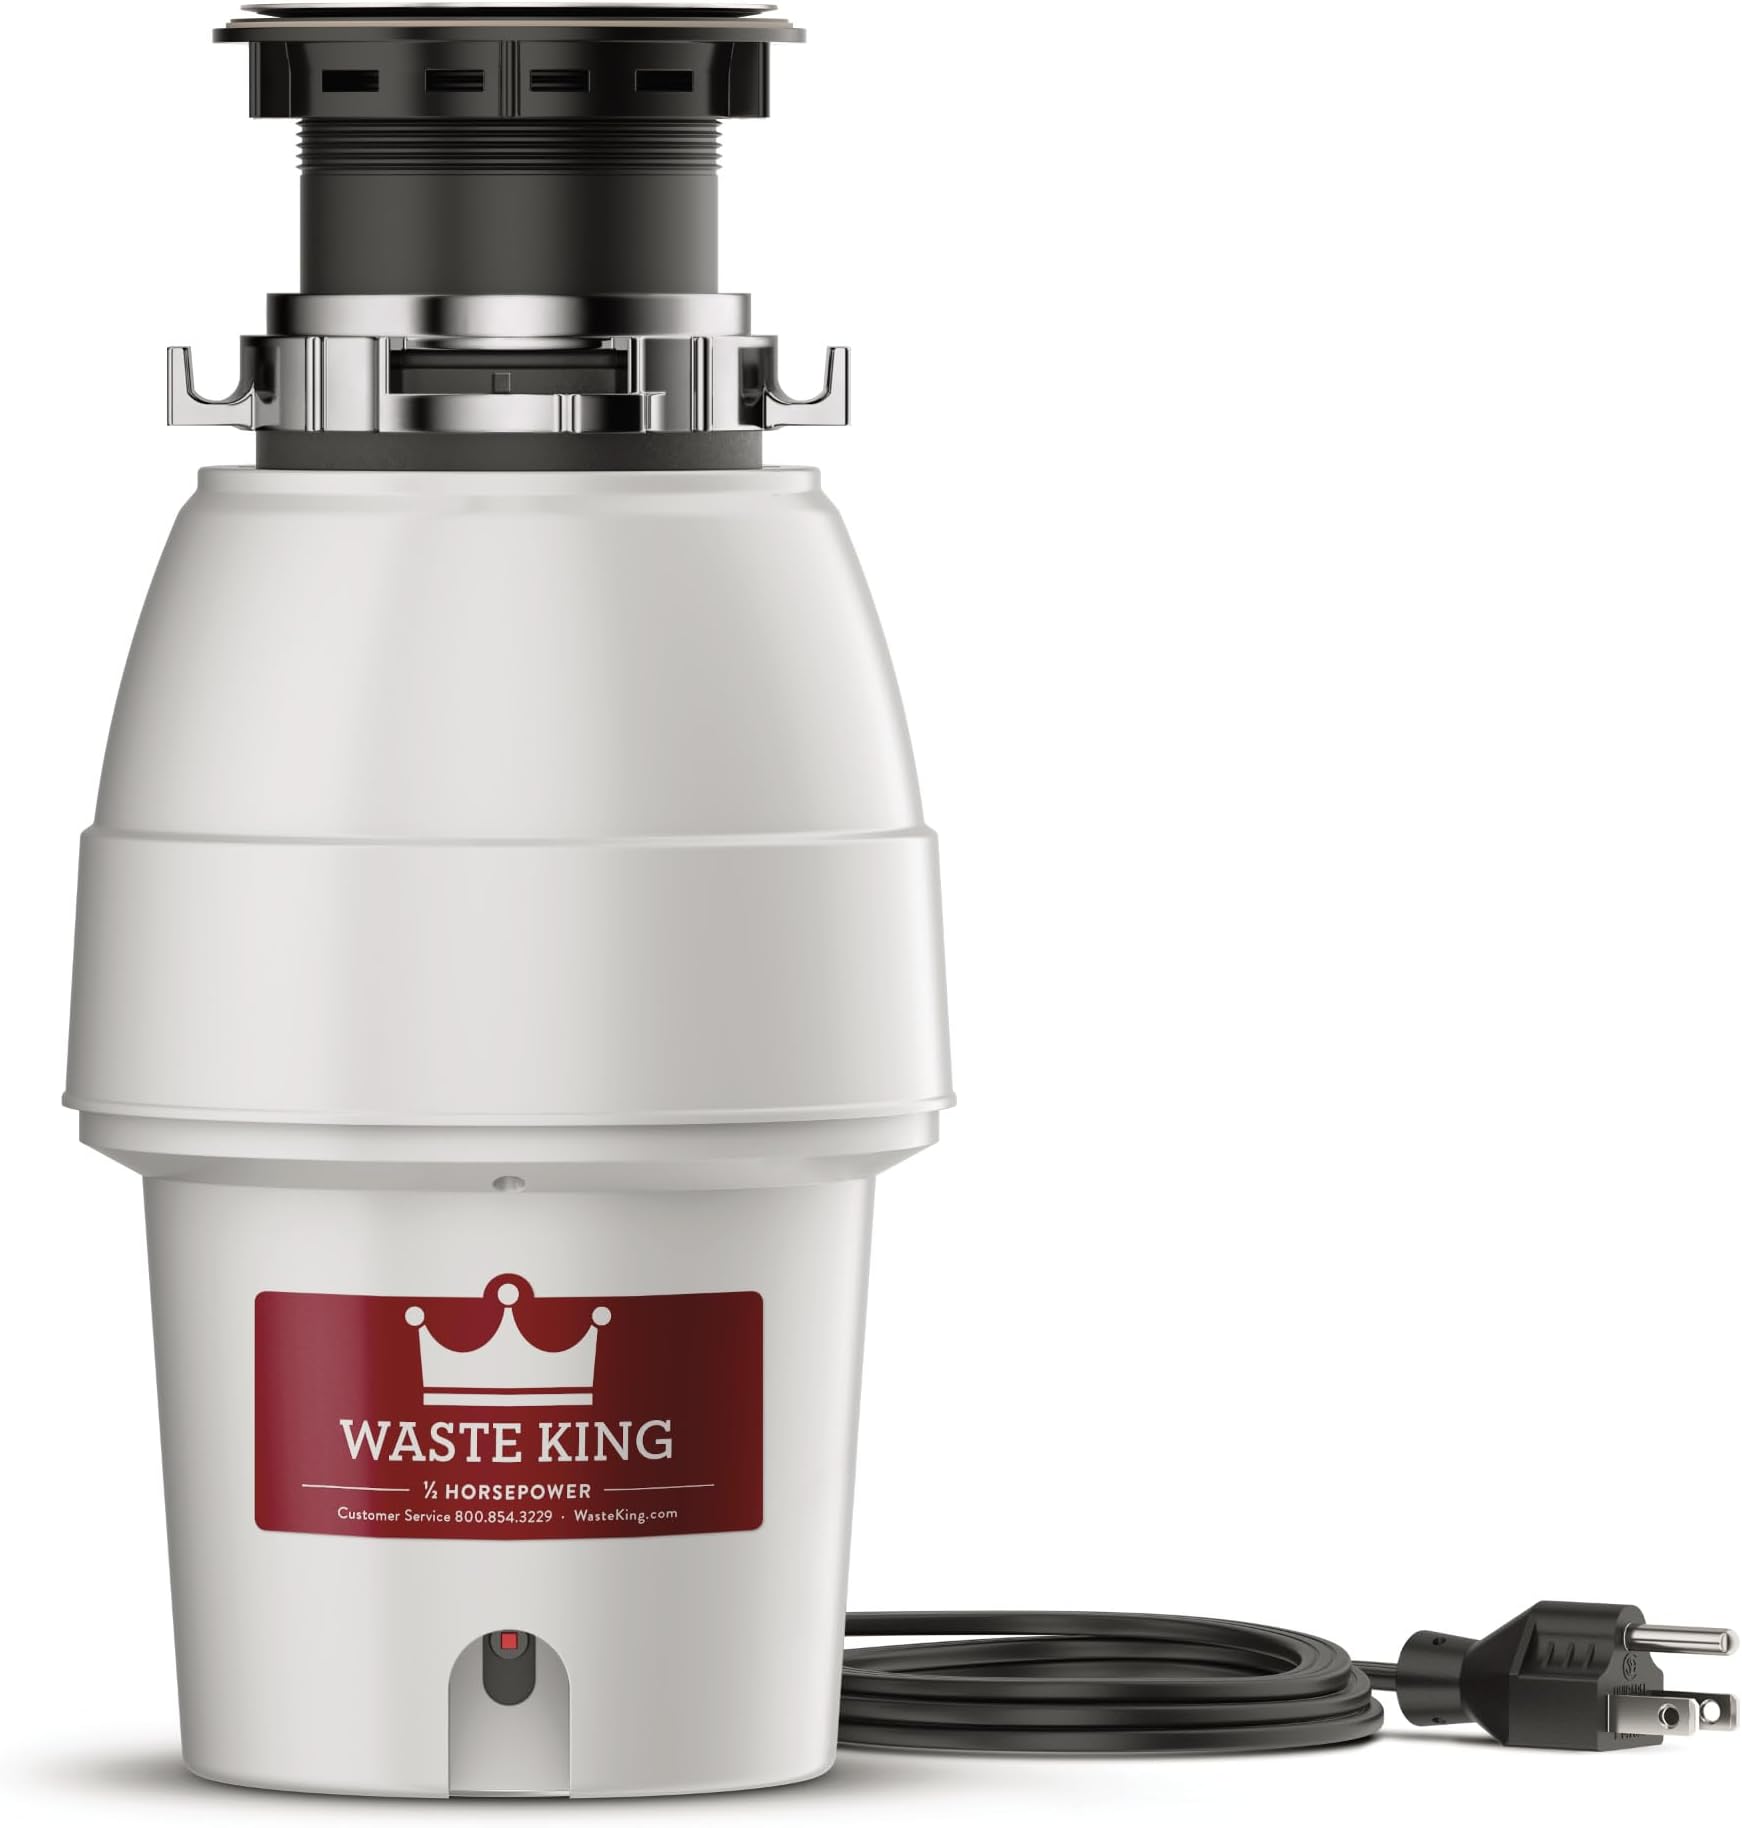
The Waste King Legend L-2600 is a 1/2 HP continuous feed garbage disposal featuring a 2,600 RPM permanent magnet motor for jam-resistant, efficient grinding. It includes an EZ Mount system and pre-installed power cord for easy installation without electrical work. Durable stainless steel components and a corrosion-proof grind chamber ensure longevity, while sound insulation minimizes noise. Backed by a 5-year limited in-home warranty, it’s designed for seamless, powerful kitchen waste management.


| ASIN | B0014X7B54 |
| Best Sellers Rank | #55,910 in Tools & Home Improvement ( See Top 100 in Tools & Home Improvement ) #26 in Garbage Disposals |
| Color | Gray |
| Customer Reviews | 4.4 4.4 out of 5 stars (7,821) |
| Date First Available | September 14, 2004 |
| Finish | Polished |
| Horsepower | 0.5 |
| Included Components | 36-Inch Power Cord, Continuous Feed Operation Garbage Disposal, Splash Guard |
| Item Package Quantity | 1 |
| Item Weight | 7.8 pounds |
| Item model number | L-2600 |
| Manufacturer | Moen Incorporated |
| Material | stainless steel corrosion proof polymer |
| Part Number | L-2600 |
| Pattern | 5 Year Warranty |
| Power Source | electric |
| Product Dimensions | 6.75 x 6.75 x 13.5 inches |
| Shape | Round |
| Size | 1/2 HP - Continuous Feed |
| Special Features | Compact |
| Style | Disposal Only |
| Usage | Food Waste Disposal |
| Voltage | 115 volts |
| Warranty Description | 5 Year Warranty |
C**N
Love it so far; good upgrade over ISE Badger
The old 1/3 HP ISE Badger garbage disposal in my house was in the house when I bought the home 10 years ago so the old disposer is AT LEAST that old. It worked pretty well for these 10 years, but during that time it would jam frequently which required me to use the wrench tool to release the jam. Last week, the disposal started inexplicably leaking from the bottom whenever I ran the water on that side of the sink. I didn't spend much time trying to fix it since I had been putting replacing it anyway and decided to go ahead and purchase a new one. I originally wanted a 1 HP model, but saw that the 1/2 HP was half the price and STILL more powerful than my existing one so I opted for the L-2600 Legend instead. Another plus is that it is much cheaper on Amazon then what I find in the B & M stores. So even though I had to wait a few days it sure beats paying double for comparable models in the local stores. The day after the disposal arrived, I went to my local hardware store to purchase the tools I thought I would need and based on what the instruction manual said. The things I purchased separately are as follows. 1) Plumber's Putty 2) Mini Hacksaw 3) Pipe Wrench 4) Wire Nuts 5) Assortment of different sized strain reliefs (called Clamp connectors in the store). Because I couldn't figure out what size I needed I purchased 3/8", 1/2" and 1 1/4". 6) Assortment of water tight connectors just in case Out of these things I only needed the Plumber's putty and one of the Clamp connectors I purchased (3/8" with 1/2" knockout). I returned the unused strain reliefs to the store but kept the hacksaw and pipe wrench to use for future projects. Function This disposal is amazingly quieter than my old ISE, which is good since I just replaced a noisy 10+ year old dishwasher last year. It seems to have no issues grinding up old food or jamming which my ISE seemed to do frequently. I think this is a good relatively inexpensive replacement for your old broken disposal or just as a nice upgrade. I purchased the 1/2 HP because I didn't want to spend too much since it was an unexpected expense. But from what I've read, for most people the 1 HP (Waste King L-8000 Legend Series 1.0-Horsepower Continuous Feed Garbage Disposal) is better especially if you have a big family and/or frequently have a lot of guests over for parties or what not. Neither of these apply to me and since 1/2 HP was STILL more powerful than the 1/3 that came with my home, I was still coming out ahead. INSTALLATION (DIFFICULTY) Power Cord -- Can it be removed? ---------------------------------------------- Before I continue, many people (like myself) may wonder if the Power Cord is removable, the short answer is yes its removable, I removed mine because all the appliances in my home are hard wired Here are the steps I did to remove the cord while preserving it if I want to go back and use it later 1. Unscrew the metal plate on the bottom of the disposal. 2. Find the wires that run from the power cord (should be a white, black and copper wire) 3. Depending on how the wires are connected you may have to use a wire cutter to free the wire from the connector. Mine wasn't connected with wire nuts, but a plastic connector that seemed to be a permanent connection so it couldn't be twisted off. So what I did is stick a utility knife under the plastic connector and cut away at the exposed wire until it came out. I repeated this for the other wire. 4. To remove the copper ground wire, I just unscrewed the green screw to release it. 5. Removing the power cord assembly is a little harder; to do this I inserted a flathead screwdriver end under the rubber plug and pryed it out; this take a few tries as its in there pretty good. A WORD OF WARNING: DO NOT use a utility knife to try to pry it out, I stupidly tried this since I was too lazy to go to my tool box to get the proper tool and ended up stabbing myself in the thumb with the knife after it slipped, after learning my lesson I got the flathead screwdriver instead. 6. Once the rubber plug is released you should now be able to pull the power plug out through the opening. 7. Don't forget to use a wire stripper to prepare the remaining wire under the disposal to connect to your existing wires in your home. ---------------------------------------------- Installation of the Waste King itself was pretty simple; removing the old one...not so much. Prior to me installing a range hood and a dishwasher last year I had no experience installing appliances, but I was able to install this disposal by just following the instructions provided in the manual. Comparing this install to my range hood (non-vented), and my dishwasher, i would say it's harder than installing the range hood but slightly easier than installing the dishwasher. My old disposal wasn't connected to my dishwasher so I decided not to connect the Waste King to it either. I may go back and connect it later on, just not right now. If you want to read on about my installation experience it starts below, otherwise you can stop reading right here. INSTALLATION (TIME AND PROCESS) The install took me 7+ hours. Not because the new garbage disposal was hard to install, it was because the old one was such a pain to get out. While I had no issue getting the disposal itself out, the old sink flange was virtually impossible because it looks like the people who installed this disposal screwed the mounting bracket on too tight and ABOVE the threading on the lower part of the sink flange. As a result, no matter how many times I turned the mounting bracket it wouldn't go anywhere because it wasn't catching the threads to move down and come loose. If the sink flange and mounting bracket weren't so old, I would have just installed the Waste King over on that using the Easy Mount adapter kit, (which I bought separately just in case). But because it was so old and I really wanted to switch to the easy mount system anyway, I was determined to get it off. Normally, after removing the old disposal, you should be able to screw the mounting bracket off from under the sink and lift the sink flange up from the top of the sink. However because the mounting bracket just would not screw off because it didn't seem to be able to catch the threading. I decided to try to bend the edges of the sink flange that sits on top of the sink far enough so I could push it down through the sink instead of lifting it up. However I had no idea was I was getting myself into when deciding to try this. This process alone took a good 4 to 5 hours because whenever I would bend one side another part would stick out making it too wide to go through. After about 3 hours of using my wrenches (the hacksaw I bought was useless in cutting the flange), I went to the garage and got my tree branch cutters to try to cut the old flange so I could bend it more. The branch cutters made the job a little easier but still took almost two hours to get the flange bent enough so that I could push a part of it under the sink so I finally hammer the rest through. I also ended up slightly damaging the circular opening of my sink in doing this, but hopefully the plumbers putty will continue to stop any leaks as a result of the damage. UPDATE: Turns out I made this much harder than it needed to be. After examining the old sink flange assembly after removing it, I noticed a metal ring around the top of the threading that was preventing the bracket from screwing off. I did see this when trying to get it off but didn't know what that it was a separate piece and I thought it was part of the threading. Just out of curiosity I inserted a flat head screw driver around the edges of the metal ring and it popped right off making the mounting bracket easy to screw off. I am kicking myself for not seeing this before and it would have saved me 4 hours and would have prevented the damaged I caused. Oh well, I'll know for next time and hopefully you won't make the same mistake I did. After FINALLY getting the old sink flange off, installing the new disposal with the EZ Mount System was pretty simple. I put the new sink flange in and following the instructions, checking for and correcting any water leaks before I continued. While following the EZ mount instructions I didn't think the rubber cushion would be strong enough to hold the disposal without falling down, but a quick check showed that it would hold. After getting the sink flange prepared to hold the disposal next was the task of connecting the wiring. If you have an outlet under your sink, then USE it, it saves about a half hour of labor. Unfortunately I don't have an outlet under my sink and I didn't want to incur the extra expense of installing one under there, so I had to stick with hard wiring. As far as connectors go, I ended up using one of the water tight connectors instead of the 3/8" clamp connectors I originally planned to use. Reason being is that while testing out the connectors to see which ones would fit, the water tight connector was a perfect fit and I just never took it off and after the ordeal of getting the old sink flange off, I didn't want to waste any more time. I used my tool box to lay the waste king on then I connected it to the wiring in my home. The hardest thing here was getting the ground wire around the green screw. So I just ended up taking the green screw out completely, placing the ground wire directly over the hole, and then screwing the green screw back in. After I had the disposal connected to my wiring, all that was left was to mount the Waste King to the sink flange. This was incredibly easy and only required hammering to get the notch to the locked position. After mounting the Waste King now was the time to reconnect all the pipes. Because I don't run my dishwasher to my Garbage disposal, I only had one pipe to connect and surprisingly, the opening of the waste king was at the exact same level as my old ISE was; so the old pipe lined of perfectly. Everything was now hooked up so I turned the power back on to the disposal and let it run with running water. And SURPRISE!! Leaks! Leaks from under the sink, and leaks from the piping. I applied more plumbers putty under the sink as well as re attached the pipe and tried everything again. This time there were no noticeable leaks but I still am not ready to call the install a success just yet. I did this install on the 26th of March and have been monitoring it periodically for and standing water under my sink. So far no leaks, but I will probably give it another week or so before I'm 100% confident in my install.
T**G
Waste King - Good Value and easy to install
This is the second Waste King disposal that I have purchased. The original one lasted more than 10 years....so long I can't really remember. The problem I encountered, which is typical for a disposal, was the failure of the rivet that holds the small blade that breaks down the disposed waste. This new disposal is called the Legends Series model 2600 with the EZ-Mount attachment. It is a 1/2 HP unit replacing a 1/3 HP Pulverator model. The nice thing about the EZ mount is after you install one you will never go back to the 3 bolt mounting system and here is why. When you install disposals that use the 3 bolt flange (including other Waste King models) you need to position yourself under the sink, in very tight quarters with a either a single or a pair of wrenches to secure the disposal to the flange attached to the underside of the sink. This is a bit tedious and once you go through the process you will really appreciate the EZ-mount. Removing the disposal for replacement, to retrieve something dropped into the sink that cannot be grasped from above the sink, or if you have a leak at the gasket between the sink mount and the disposal is laborious with the 3 bolt mounting. I would estimate that it takes about 10 minutes to remove the 3 bolts to drop the disposal out. In comparison the EZ-Mount requires the same effort to attach the sink drain as the 3 bolt system but once it is installed the EZ-Mount has a very clever bayonet style locking device whereby the disposal flange (part of the top of the disposal unit) is lifted up into the EZ-Mount ring and with about a quarter turn of the ring to the right the unit locks in place. If you need to remove the disposal you firmly hold the disposal with one hand and rotate the ring to the left and the disposal disengages from the EZ-Mount. No tools and less than 10 seconds to remove it. And you can do it while sitting on the floor in front of the cabinet instead of being wedged inside it. This is much more user friendly with less chance of straining yourself. Be aware that the EZ-Mount is unique to the Waste King Product line but I can assure you that selecting this unit does not mean you will be trading off performance, quality, or cost. You will get all that plus the ease of install and removal that I mentioned above. So why did I select a ½ HP unit instead of the available Waste King Model 111 (1/3 HP) unit when it costs more and I had no issue with the performance of the old unit? I could have safely opted to go with the Model 111 or the Model 1001 (1/2 HP) unit but the key physical mounting and locations of the plumbing and dishwasher hoses were the same so I opted to move up to the better Model 2600 unit that offered a 5-Year warranty instead of the 2-Year warranty that comes with the 111 and 1001 models. As for prices and detailed information I went to the Waste King site ([...]) and found the following: Model 111 - $65, 4AMP, 1900RPM Model 1001 - $75, 4.5 AMP, 2600 RPM Model 2600 - $100, 4.5 AMP, 2600 RPM I called Waste King's number and learned that shipping was $15 anywhere in the continental United States. With that I was looking at $115 which would have still been a good deal for the unit. I was hoping to buy the unit from one of the big home improvement box stores so I could get the job done right away. I was not able to find the unit but I remembered seeing in my Google search a result for Wal-Mart and Amazon.com. Wal-Mart had the unit for $97+ and it would be delivered to the store in my area within 5 business days for pick-up. I suspect that taxes would be added as well but I did not see any shipping charges so this looked like the best option until I looked at Amazon.com. Amazon had the unit listed at $76.38 and the shipping was free. I ordered the unit on Monday and had it Thursday afternoon (3 days total). Clearly the best price, delivered quickly and it was two steps above the replacement equivalent unit. I am very happy with the product, the installation, the price and delivery service provided by Amazon and would have to rate the entire process as a 5 of 5. Install details: Total time to install the unit was less than 10 minutes since I kept the old EZ-Mount sink flange and gasket in place. I was glad that the unit was so easy to remove because I found that after running the water I did have a leak. When I removed the disposal I found that I pinched the old gasket so I replaced it with the new one and in less than 2 minutes the unit was back in place and water tight. Had I removed all of the old disposal components including the sink flange it would have taken less than 30 minutes to complete the installation. On a difficulty scale I would call it a 2 of 5 provided your old unit has a power cord that plugs into an outlet. It would rate a 4 of 5 on difficulty if the old unit was hard wired directly to the power source and you need to install a GFCI receptacle. My old unit was hardwired so I took the time to update the electric (before the disposal arrived) to include a GFCI receptacle using a metal water tight box with a ½ flex plastic conduit and water tight connectors. This was done to keep water out of the box but it does not protect the face of the receptacle. If you need to install an outlet make sure it is a GFCI device that matches the size of the circuit breaker in your fuse panel. It should a 20-AMP breaker. Note that the Model 2600 disposal only draws 4.5 AMPS of power but with the higher RPM rating it is capable of providing more horse power to speed up the disposal process.
A**Z
Best bang for your buck!
Like the other reviewer, I bought this to replace 20 year old 1HP(Kenmore) disposer which had burnt out one weekend. To be honest I was very intimidated to replace the disposal unit. However, the installation was straightforward and actually quite easy. I had to remove old one, clean some old plumber's putty and make sure contact surface was clean before I put the new one on. There was no plumbers putty included so I did have to run out to buy some which seemed a waste. My old unit used a 3 bolt attachment, but when installing the Waste king I went with the EZ method which was effortless to install. One note that was helpful in reading the other reviews is to put some liquid soap on the gasket of the disposal unit when attaching it to the EZ mount attachment. It will make the job much easier. Finally, the outlet orientation and dishwasher inlet were in just about the exact same spot as the previous disposer. I did need to work on adjusting my plumbing, but I was lucky that they were minor adjustments. The disposer comes with around 2-3 feet of cable with standard 3 prong plug on one end, which I removed prior to installing below the sink since my old unit was hardwired. The instructions will help you with this, but really it was very simple. My only complaint here is that the rubber plug where the wire goes into the unit and prevents moisture from accidentally getting into the unit is actually a molded part of the 3 prong plug assembly and therefore I was not able to re-use it for my hardwired line. It would have been nice to slide it off the 3 prong plug cord and slip it onto my wire and then plug the inlet hole. After I rewired the unit I tested with just water running to insure there were no leaks and that the unit worked. It works great and runs quiet. In fact I actually removed the splash guard once to make sure the blades were spinning it was so quiet. The removable splash guard is also a nice feature and will be easy to replace over time. My old unit's spash guard was almost non-existent but in order to change it, I would have had to remove the entire unit. I think this is the best bang for your buck these days. First, its quality using stainless steel blades and chamber walls and secondly it comes with 5 year in home and life time rust warranty. I did run to Home Depot and see what they had to offer when I was doing my research. The cheapest disposal on the shelf was a Badger 1/3HP which was actually $99 + tax. But many of the Badger models I researched online and on Amazon did not get rave reviews. I decided on The Waste King 2600 after reading all the reviews and am now writing one due to my complete satisfaction. I was considering the cheaper Waste King 1001 model, but decided to go with the 2600 for the 5 year warranty. Plus the 2600 resembled my old Kenmore unit in shape and size and I assumed it would be more compatible when installing and is one reason I believe that my plumbing adjustments were so minor. I am very satisfied with my purchase and only wish that I had done this sooner. The Waste King 2600 1/2HP motor works just as good as my old 1HP Kenmore unit. Plus, it doesn't stink when running like an old 20 year old unit.
C**T
Impressive product and customer support
Like several of the other reviewers, I purchased this to replace a Badger 5. I found the Waste King product impressive on a number of areas. The warranty is five years and it includes in-home service, which is a rarity nowadays. Some of the larger Waste King models (1 Hp) have a lifetime in-home warranty. I looked at them, but decided to go with the ½ HP version since I only use the disposal for plate scrapings (bones go in the trash and vegetable peelings go into the compost pile) and didn't want to buy way more disposal than I needed. Waste King offers two mounting options - the traditional three bolt method, and the EZ method. This model is the EZ method and, true to its name, is really easy! Very clear instructions come with the unit, plus there are videos on the Waste King site to walk you through the process. If you have even the most basic of tool skills and can follow instructions, this is a job you can handle. The other feature I liked about the EZ mount option was that the rubber guard (the piece of rubber at the top of the opening that you push scraps through) is removable for cleaning. It is not removable in the 3 bolt mounting option and, considering how horrible the one looked in my Badger after a few years, I wanted something that I could take out and clean (or replace). But, all the parts in the 3 bolt option are stainless steel, whereas there are plastic parts in the EZ mount option. The plastic seems sturdy enough, so I hope it will last a long time. I'm especially pleased to report that Waste King has outstanding customer service. I emailed them some questions before I ordered, and they replied in a few hours, and answered all my questions in full (versus just those canned boilerplate responses you sometimes get from companies). After it arrived I had a question regarding if the sink flange (the part you see when you look into the sink) was plastic or stainless. So I called them and got an answer very quickly (it is stainless). Very pleasant phone call, and minimal (3 or 4 min) hold time. Product works great. It runs faster (higher RPM) than the Badger, so it grinds quicker. Not as ultra quiet as the really high end ones, but less noise than the Badger. It has stainless cutters which should outlast the galvanized ones in the Badger by a long time. Works well, easy to install, great warranty, excellent customer support, great price. What more could you want!
I**N
Quality Item/Upgrade from In Sink Erator
I purchased this item from Amazon Warehouse at a significant discount due to the damaged box. When I opened the box (which had never been opened), I noticed that the accessories (drain elbow, hardware, sink mounting rings, etc.) were inside of the garbage disposal. After turning the disposal upside down, I was able to locate all accessories. I also removed the instruction booklet from inside the box. I would advise anyone installing a Waste King disposal to read the directions as the mounting system is slightly different from In Sink Erator (specifically, the quick mount system). After looking at the directions, I began removing my old In Sink Erator (ISE) and the drain mounting pieces from the sink itself. One thing I could not find was how to release the old mounting ring from the ISE on the underside of the sink as it was extremely rusted from leaking. FYI, if you're removing this, there is a clip on the inside of the ring that pops out easily with a screwdriver, allowing the ring to come off the sink drain that inserts from the top side of the sink. Once I removed the old drain mounting hardware, I cleaned off the old plumber's putty and used abrasive to make sure it was all gone. Once cleared, the new sink drain mounting system was easy to install. I used the rubber gasket provided and tightened down the plastic screw ring on the underside, with the cardboard ring above the plastic piece. DO NOT use plumber's putty AND the rubber gasket; it's either/or. Once the new sink drain was tightened down, I installed the quick mount ring. I slid the quick mount ring up the tube of the drain and then placed the rubber piece ONTO the end of the tube. DO NOT try to to slide the rubber piece up the tube or between the metal ring or it won't hand down properly. If you need help, there are YOUTUBE videos showing this. If you are having a hard time, you are not doing it correctly and it is not the Waste King disposal. Once the quick mount system is in place, the disposal slides on easily and I was able to mount the existing plumbing to it without any changes. One item I did need was a thick rubber gasket from the drain elbow provided. I placed this gasket onto my existing plumbing so that the drain could be tightened down properly. I then mounted the dishwasher drain line to the disposal AFTER punching out the plastic plug in the dishwasher drain line. I removed the small, white plug from inside the disposal even though the directions stated you could just grind it up. USE: I found the Waste King to be significantly quieter and smoother operating than the same HP ISE. The ISE it replaced was VERY old, but I recently replaced a disposal in another home with a new ISE and found it to be pretty much the same as the old ISE's. So far, the Waste King handles any scraps quickly and efficiently with less vibration and noise. I do have to be careful what foods I put down the drain due to our pipes though. Overall, this is an excellent garbage disposal for the price and I would highly recommend this item to anyone. I cannot comment to the reliability of this disposal but it does have a 5 year warranty.
-**-
Good replacement for a defective In-Sink-Erator
7/1/2015: I finally got around to installing this beast, ordered a few weeks ago. The plumbing under my sink still needs some work, and that is what actually took up most of my time. (I plan on redoing it.) The problem under my sink is that the house was built in 1940, before garbage disposals, and the inlet in the wall is higher than it should be. Short of tearing out the cabinets and the plaster wall to move the current line or install a new one, we have to work around it. The In-Sink-Erator (ISE) has been "retired" due to the common problem with the housing cracking on the side. A former brand I trusted in two other houses, now isn't worth bothering with (at least not their cheaper Badger line of products, where all the failures are at). Aside from the plumbing, the Waste King is a cinch to install. I had the old ISE removed within a couple of minutes. Since it was a stainless sink, the ISE was attached with a rubber gasket. The Waste King was shipped with the EZ Mount system, and it is very simple to screw the new flange into the stainless sink with the rubber gasket (no plumber's putty required). I hand-tightened it, then gave it a few taps with a small hammer for good measure. For the mounting collar on the disposal, I used a bit of dish soap where the pins on the mounting flange rest, so it made tightening up that collar a bit easier. If you're wondering--the Waste King will fit in place of an ISE with no modification to the plumbing. However, you will still need to remove the outlet pipe, as you need to swap out the metal bracket that holds it to the side of the disposal, as the one provided with the Waste King is smaller. (The larger ISE bracket touches the plastic housing and won't rest completely flush.) While you have the pipe off, replace the rubber washer. My ISE's washer was still good, and exactly the same size, but it's best to start fresh and prevent problems. Plumbing tip--does that sewer smell gag you like it does me? I keep a $1 can of Glade air freshener close by, and give the area under the sink a healthy shot of it every so often as I'm working. It doesn't make a disgusting job completely better, but it does make it livable. And lunch is saved. ;) As for grinding performance, the claim is that the motor is faster. It does seem to take longer to grind food, but I believe that is because the Waste King is chopping the particles finer, as there are very small openings inside the grinding chamber compared to the ISE. I'll live with that, as it will save me from having to either use a plunger or disassemble the pipes to clear them out from clogs, which the ISE did on a regular basis. (Even just a few stray potato peels were enough to clog up the system--the ISE just never ground them up!) The Waste King is also quieter than the ISE. The (removable!) rubber splash guard keeps the innards quieter without needing to partially insert the drain plug. And it seems to vibrate less on the sink than the ISE ever did. This is a good, solid replacement for the ISE Badger. So far, it is operating nicely. If that changes, I will be back with an update.
P**K
Easy install and a great value
I own rentals in addition to being a property manager and this is my go-to replacement disposal for rentals. For whatever reason, the builders in my area always install el-cheapo InSinkErator brand badger series disposals and I am forever replacing them. It seems that the average age of failure for the badger series is about 7 years. Don't get me wrong, I really like ISE brand disposals and I have a 1HP ISE installed in my home, it is just their low-end series is really really low-end. They're what I call "apartment grade". The Waste King 2600 competes with the apartment grade price point, but is not apartment grade quality, it's better. What I hate is wasting time and money and if I install a cheap disposal, I'll be buying another one in a few years and spending more time replacing it. The Waste King is inexpensive, NOT cheap. Pros: -The 2600 upgrades you to a 1/2 HP motor from a 1/3 HP at about 1/3 less the price of the ISE Badger 1. The Badger 5 is the same HP rating, but is still more expensive than the Waste King by about $10 (newer models are Badger 100 and 500 respectively, but appear to be the same) - It has more insulation so it operates more quietly. - Easy to find reset button right on the front. Just in case you jam the unit and pop the safety, you wont' need to get on your hands and knees and feel around the bottom to find it. - It also has a stainless steel grind ring. This is the area on the side of the disposal that the spinning blades will crush against. Most of your low-end disposals only have a galvanized steel grind ring and once the galvanization wears off of the metal, which it will, the steel is exposed and will rust out. Higher-end disposals have solid stainless steel grinding chambers, not just rings, for reliability. These are great, but get ready to pay $250+ for those beauties. -Lifetime corrosion warranty. Well, this may be a no-brainer as it's almost impossible to corrode stainless steel, but what the heck, it's lifetime! - 5 year defect warranty with in-home service. Yup, that's right, if it does fail, they send someone out free of charge to replace it. The higher-end models come with lifetime in-home warranty. I tried to find complaints on the internet about the in-home service but couldn't find any. Cons: The only possible con that I have is that unlike the ISE brand, the waste kings do not have an allen wrench socket on the bottom for clearing jams. I will note, I have had to go to the rentals and use an allen wrench to clear jams on the ISEs because renters will put ANYTHING down a garbage disposal. Of note, I've never had a call to clear a jam on a Waste King. Installation: -The Waste King 2600 comes with everything you need to install it other than plumber's putty. It has the gaskets for the sinks, discharge gasket, discharge elbow, and stopper. -It is the perfect drop-in replacement for the standard In-Sink-Erator badger series. The plumbing lines up perfectly with the dimensions of the ISE badger 1 and 5 (newer editions are now badger 100 and 500 respectively) so you save time and frustration having to buy other parts or make modifications to get the plumbing to fit. -Unlike the ISE brand, the Waste King comes with the wall plug pigtail pre-installed. You could steal the old one off of your old disposal, but I appreciate that I don't have to spend the time to mess with it. Waste King may not be the brand you know and trust today, but you will.
D**.
PLANNED OBSOLESCENCE
Purchased this Garbage Disposal (model 2600 - 5 years warranty) on June 25, 2021, and installed a couple of days later. It is now June 29, 2026 and the unit is dead. Coincidence? I doubt it very much. I gave it 3 stars because it worked well while it lasted, but come on, make it last a little longer than the warranty.
R**G
Excelente producto.
Después de casi 5 años funcionando (comprado en ene/21 y funcionando a partir de jul/21), creo que ya es necesario decir que sigue como nuevo. Espero que así sigua muchos años más.
R**R
Get free from cleaning basin trap off the garbage
Very useful product to get rid of kitchen basin choke ups. In India must be used with ELC 300-Watt Voltage converter 220 v to 110 v travel power converter from Amazon. Needs to be installed by plumber
F**M
Impressive product
I've had this for over a month now and feel I can make a more qualified review. I replaced a leaking Insinkerator Badger 5 with this unit. The Insinkinerator was leaking from the bottom where the direct wired power connects to it which apparently is a very common problem and I would think very dangerous. I purchased the EZ mount version and and true enough, installation was very easy. Instructions were very clear and it was a direct drop-in replacement for the old Insinkerator. The dish washer feed line and exit pipe all lined up nicely and I didn't have to get someone to re-do any piping. Do NOT forget to punch out the block for the dish washer line if you have a dish washer. :) It took a lot longer to remove the 3-bolt Insinkerator than to install this unit. Performance-wise, it is much quieter and has no issues chewing through what we've throw at it (mostly organic material) even when the chamber is full. Another plus is that the rubber splash guard is removable so it can be easily replaced down the line once it gets nasty. For the price, easy installation, and lengthy warranty, you can't go wrong with this unit.
B**S
muy buena opción
excelente relación calidad y precio
S**)
Worst
Worst product, Worst service. When the time of purchase it was showing 5 years warranty. With in a month it stopped working. No option showing for product support. Even there is no option to reach out Amazon customer care.
Trustpilot
5 days ago
4 days ago