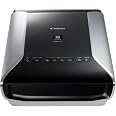
📸 Scan Your Legacy: Where Memories Meet Modern Technology!
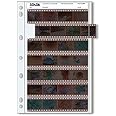
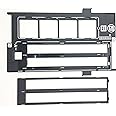
The Canon CS9000F MKII CanoScan 9000F MKII is a versatile flatbed scanner designed for professionals and enthusiasts alike. With an impressive scanning resolution of 10,000 DPI, it captures intricate details from photos, films, and negatives. Weighing just 10.1 pounds and featuring USB connectivity, this scanner is both portable and easy to use, making it an essential tool for preserving your visual history.
Item Weight | 10.1 Pounds |
Item Dimensions D x W x H | 10.7"D x 18.9"W x 4.4"H |
Minimum System Requirements | Windows XP |
Color Depth | 48 NA |
Standard Sheet Capacity | 10 |
Paper Size | A4 |
Optical Sensor Technology | CCD |
Light Source Type | LED |
Connection Type | USB |
Resolution | 10000 |
Wattage | 15 watts |
Supported Media Type | Photo |
Scanner Type | Document |
C**M
Excellent scanner but quirky software, use my links to view high-resolution scans of 35 and 120 mm film
I bought the CanoScan 9000 F Mark II scanner in March, 2013 for $179.00 and use it primarily to scan 35 mm and 120 mm film. So far I have scanned over 1,000 frames. I have uploaded low-resolution images to the Amazon site (11/26/13.. Amazon has deleted these images), and have provided (below) links to high-resolution scans. Rather than taking my word, or anyone else's, on the quality of this scanner, look at the images it has produced and judge for yourself. The links will take you to my photography web site. To view an image at a higher resolution, click on the "sizes" icon at the far-right bottom of the page; the "original" option is the highest resolution available.1.Cowboys [...]This and the five photos that follow were shot on 120 mm Fuji Velvia (transparency) film in October 1980.2.Moth [...]This and the seven photos that follow were shot on 35 mm Kodak Ektachrome (transparency) film in 1977.3.Key West [...]35 mm Kodak Ektacolor (negative) film shot in 1974.4.Santa Barbara [...]120 mm Kodak Vericolor Professional (negative) film shot in 1988.5.Biscayne Bay [...]35mm Kodak Kodacolor II (negative) film shot in 1972.For the money, I don't think you could buy a better scanner; however, the software, could be better.The Canoscan offers three programs for scanning film: Auto Scan, Custom Scan and Scan Gear. It also comes with another program, Image Garden, for cataloging and filing images. I am currently using Adobe Lightroom to do this and do not care to switch.To run Auto Scan you simply push the auto button on the scanner. The scanner detects whether you are scanning film, photos or documents, automatically selects the resolution and file format and sends files of each image to your computer. In regard to film, the Auto Scan will scan only 35 mm film in the JPEG format at 1200 dpi. If you want a TIFF format and / or a higher resolution, you must activate the Custom Scan or Scan Gear from your computer. The auto and custom scan programs will scan only 35 mm film while the Scan Gear program scans 35 mm and 120 mm formats and lets you make corrections on a low-resolution preview. I generally use Scan Gear for all my film scans because I can select which frames to scan from the preview; the other programs scan every frame.For the most part, the programs work OK, but are far from perfect. Each program requires you to designate a folder on your computer that will store the scanned images. If you create different folders for each program you will get triplicate files of the same images no matter which program you use.While the scanner's uncorrected output is pretty good, a serious photographer would probably want to make post-scan adjustments using more specialized software such as Adobe Lightroom or Photoshop. The Scan Gear program can make useful adjustments, such as flip or rotate, but does a terrible job on the finer adjustments such as color balance, exposure and contrast.The scanner's ability to output "TIFF" files rather than just "JPEG" is a real advantage. The TIFF format is uncompressed meaning that it captures more information than JPEG and thereby allows a wider range of corrections (assuming you have the software that can make the corrections). Unfortunately, the TIFF files are about four times the size as JPEG.When I first tried to scan a full-frame of 120 mm film at 9600 DPI (the highest) resolution, I got an error message: "Scanner cannot be performed unless the crop size or output resolution is reduced to 10208 x 4032 pixels or less." This message also appears, but less frequently, when scanning 35 mm film at full-frame. By trial and error, I found that I cannot scan a full-fame of 120 mm film at more than 2400 dpi. I also discovered that if I use a crop tool to reduce the size of the scan area, I can avoid the error message and scan at 9600 dpi. This scan, however, creates a very large file of more than 500 MB. The manual does not explain what this confusing message means. It appears to say that you must reduce resolution in terms of pixels but the scanner settings are expressed in dpi's. (Pixels and dpi's are not equivalent terms). I thought that I might have an outdated driver, but the Canon web site offers only one driver: "9000F MarkII MP Drivers Ver. 1.00" while the scanner came with driver 19.0.2. It is not clear which is the more current, so I am still using the driver that came with the scanner.Despite the software quirks, I am giving this scanner five stars because it is reasonably-priced and produces scans that are comparable to drum scans.4/12/14 update: Today I noticed that Amazon has deleted my links to high-resolution scans that I could not post on their web site. I have written to Amazon asking whether they now forbid reviews to include links to external, non-commercial web sites.
R**R
Open Sourced Linux Driver
I noticed one major feature difference between the Epson V600 and Canon 9000f (MKII), Epson's driver is primarily closed source or proprietary and the Canon 9000f (MKII) driver is entirely open source code.There maybe some benefits with the closed source code Epson IScan driver, but history dictates products having open source code drivers usually rival products having only closed source code drivers. The main feature of open source code drivers, the code is backwards and forwards compatible with past and future operating systems. Also, open source code drivers tend to be always readily available, versus closed source code having a tendency of their download mirrors simply disappearing due to internal business decisions.There is a web page detailing some of the differences between the Epson V600 and Canon 9000f scanner models, by searching with an Internet search engine and using the search term "Epson V600 Canon 9000f MKII versus". This page listing the differences is published within the versus.com domain name.In brief, the Canon seems to win over the Epson unless you want 16 bit reflective grayscale scans, then the Epson V600 would be your choice. In practice, scanning black and white photos with a scanner not having 16 bit grayscale output can still be achieved by simply scanning in color 48 bit which outputs to 16 bit. Then open the image file using your photo editor and click "Image > Mode > Grayscale" to convert the RGB/color image to grayscale!Further reviews by filmscanner.com shows the following effective viewable resolution comparisons:Epson Perfection V600 Photo 1560ppi (less than a quarter of the claimed 6400ppi resolution)Epson Perfection V700 Photo 2300 dpi (less than 40% of the claimed 6400 dpi resolution)Epson Perfection V750 Photo 2300 dpi (less than 40% of the claimed 6400 dpi resolution)CAnon CAnoScan 9000F Mark II 1700 ppi (17% of the rated value of 9600ppi)Also, scanning photos (or reflective media and not negatives/positives) is limited to the manufacturer's 4800 dpi resolution on all scanners mentioned above. They're higher stated dpi/ppi resolutions are only for negative & positive media. Makes me wonder why more people by the Epson versus Canon. The Canon seems to be a far better deal all over, unless you're buying a Nikon (or other scanner) specifically for scanning negatives.Pros1) Open Sourced Linux Driver (ie. sane-backends "pixma")2) Many improvements over the Epson V600, such as better power management3) ScanGear (or IJ Utility included within the Canon Driver package) are useful and apparently adequate. ScanGear's Advanced menu without thumbnails appears to be very similar to Linux XSane with having a few additional customizations.4) Scanner seems very light weight, and I like the inside cover unique insertion, and can be easily removed for scanning negative/positive media.5) Power management is another huge plus. I always hated seeing my older scanner filament lights alwayspowered on.Cons1) Only able to perform 16 bit grayscale negatives/positives and color reflecctive media. Only 8 bit grayscale reflective (ie. Black and White Photo), versus the Epson V600 able to perform 16 bit negative & reflective grayscale media. Other than this, both are able to perform 16 bit color. But if 16 bit reflective grayscale is needed, then just scan the black and white photo as 16 bit depth color and then transform to black and white. (This is likely why Canon negated the 16-bit depth reflective grayscale feature, as reflective color scans support 16-bit depth color.)2) The My Image Garden software (680 MB) and Quick Menu are basically useless. These two pieces of software will not function within VirtualBox Windows XP session, using NVidia binary drivers & Linux. (The problem occurs with Virtual Box Windows' 2D/3D display acceleration, as these application's graphical interfaces apparently depend upon the acceleration.) However, any software usually bundled with any purchased hardware is basically useless, except usually the in-house created utility and drivers for operating the basic hardware components.3) Digital Ice or FARE (or scratch and dust fixing) seems like a gimmick for flat bed scanners, and only useful for scanning negatives. Hardware not specifically made for scanning negatives/positives, do not include the full version of the Digital ICE software for fixing negatives. Even then I've heard it's just best to perform all image fixing from within the Gimp or Adobe Photoshop, as automatic filters tend to provide unexpected results. The other option if you strongly desire the infrared image hardware fixing features, buy VueScan or other after-market proprietary software. If you have many negatives to scan, strongly consider buying hardware desired specifically for scanning negatives; and infrared image fixing is desired, buy VueScan or other third party capable software.TIP 1: Old 4x6 black and white photos are scanned in as color 16 bit (ie. Input 48 bits color) at 600 DPI and then transformed to grayscale from within the Gimp. Smaller photos will likely benefit from the higher 1200 DPI. Rotate as required and use; 1) Image > Mode > Grayscale, 2) Colors > Levels > Auto should produce good grayscale images. I tend to keep the initial scanned image file size at around 100MB.TIP 2: When working with old color photos, instead of using Auto Levels, try using Colors > Auto > Equalize.TIP 3: For Windows' operating system users, avoid installing My Image Garden (mig @ 680 MB) and the (Canon) Quick Menu software when prompted for selecting or deselecting installing software components. Only select to install the Adobe 1998 Profile and Canon Driver, for which the driver includes the IJ Utility and ScanGear. There will be no shortcuts created on the desktop until you make one using the Program Files entry shortcut. Also, update your driver and Adobe Profile by downloading the updated software online at Canon.com. The updates are several months older than the CD that was provided with my scanner. When using ScanGear, make sure to set file saving settings to TIFF instead of default JPEG for best results. There are no additional compression settings for TIFF files.TIP 4: For Linux users, Linux XSane includes an open source driver, with XSane able to scan at 16-bit depth for color reflective scans only. When scanning grayscale (or black and white) photos, scan in color (16 bit depth) as previously mentioned and then use the Gimp to convert the Image > Mode > Grayscale. Also CMS color management profiles are contained within the Canon driver CAB files. (ie. CNSN0D.ICC, CNSP0D.ICC, CNSR0D.ICC) Using hexedit, hexedit clearly displays each color ICC profile as negative, positive and reflective. You'll need to manually select the profiles when scanning either negative (ie. negative/positive) or reflective media. ImageMagick's identify or the Gimp is your friend for displaying scanned image file properties, or ensuring you're getting 16-bit depth scans. Save scanned image either as PNM or TIFF without any compression. Can also embed the scanner profile into the image. (ie. CNSR0D.ICC 212KB)TIP 5: ScanGear does not provide color profiles for negatives. VueScan does provide color profiles for negatives. (ie. Standard, Kodak, ...) When comparing scans from Canon ScanGear and VueScan, the ScanGear scans look very similar to VueScan except ScanGear's scans seem to be too colorful or over-saturated (eg. Lawn grass looking to comic book color green.) ScanGear's color negative scans also look slightly unnatural versus using VueScan after using "Lock Film Base Color"/"Lock Image Color" method. As such, VueScan scan's have a more realistic color look. If you're performing color scans, especially color negatives, it is likely best to invest the $80 for VueScan Professional. Some settings within VueScan seem tricky without hover-over hints, requiring some searching for definitions for configuration settings. VueScan works within Windows & Linux, including infrared fixing for negatives. I've read quite a few negative reviews for SilverFast. XSane (Sane for Linux) appears relatively good for reflective bed scanning, and barely adequate for somebody performing few negative scans. The nice feature with ScanGear, ScanGear's multiple auto cropping for negatives works well versus VueScan's multiple auto cropping. I tried to include the two photos comparing ScanGear to VueScan, but Amazon.com wouldn't permit the upload.Tip 6: Instead of using VueScan's preset negative color profiles (ie. KODAK GOLD 200 Gen 6 GOLD 200-6), it's said to be best and of little effort to perform the color profile yourself. Follow steps listed on VueScan's "Advanced Workflow Suggestions" (http://www.hamrick.com/vuescan/html/vuesc16.htm) and ignore the "Lock exposure" option as this option likely no longer exists. First set the Color > Negative Vendor to standard, then preview a negative and crop an area of print which is pure black for a negative. Perform a second preview (for the cropped black area) and then tick "Input > Lock film base color". The film for this roll of film is now color profiled. Using the preset negative color profiles, I've witnessed slightly brighter images (slightly washed-out) than using this custom profile method.TIP 7: I think the reason why many Linux Sane/XSane users migrate to VueScan; when scanning negatives, there is no complete infrared support and good color profiling (ie. ICC/ICM) support. Although there is infrared source code (ie. antidust.c), antidust.c support is currently not integrated into Sane/XSane or at all useful to end users. Although XSane does allow users to create their own medium definition, medium definitions cannot be used at the same time color profiling support is activated. (ie. CanoScan 9000F CNSN0D.ICC negative ICC/ICM, cannot use both the ICC and custom media definition for which are two color definition tactics apparently used at the same time from within VueScan and Canon's ScanGear.)TIP 6: When scanning negatives or film, whether color or black and white, first preview the negative then rectangle select an area of the negative's border. Click "Lock Film Base Color" and click preview again. Click "Lock Image Color" and click preview again. Now you can maximize the crop area and perform the final scan without worrying about black/white clipping or orange masks. (As they say, film or color film profiles suck! Just use this lock method workflow, providing far better results!)TIP 7: Preferably, save to RAW TIFF (not DNG) only and then use VueScan's "scan from file" function. This gives you a digital negative, for which you can later use DarkTable (or other RAW image manipulation application) for manually augmenting, or in my case for fool proof archiving.TIP 8: I haven't seen much difference between 4800 DPI and 9600 DPI, albeit 9600 DPI double or quadruples the file size. I just played with an UnSharp Mask and Gaussian Blur on a 4800 DPI image, and it turned-out looking very similar to the 9600 DPI scan, but with a far smaller file size. (The work piece was an old black and white photograph, and might see better results with recent color film.)
Trustpilot
4 days ago
5 days ago