Buy anything from 5,000+ international stores. One checkout price. No surprise fees. Join 2M+ shoppers on Desertcart.
Desertcart purchases this item on your behalf and handles shipping, customs, and support to Finland.
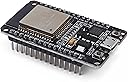
🚀 Unlock next-level IoT power with the ESP32 WROOM-32 — where compact meets cutting-edge!
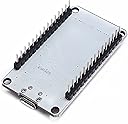
The Teyleten Robot ESP-WROOM-32 is a compact, dual-core 240 MHz microcontroller development board featuring 2.4GHz WiFi and Bluetooth 4.2 connectivity. Built on advanced 40nm low-power technology, it offers robust performance, extensive GPIO support, and seamless Arduino IDE compatibility. Ideal for professional-grade IoT projects, this durable and portable board delivers reliable wireless communication and efficient multitasking in a sleek, space-saving design.
| ASIN | B08246MCL5 |
| Best Sellers Rank | #330 in Single Board Computers (Computers & Accessories) |
| Brand | Teyleten Robot |
| CPU Model | Core M Family |
| CPU Speed | 2.4E+2 MHz |
| Compatible Devices | Arduino Boards |
| Connectivity Technology | Wi-Fi |
| Customer Reviews | 4.5 out of 5 stars 638 Reviews |
| Item Dimensions L x W x H | 2.03"L x 1.12"W x 0.51"H |
| Manufacturer | Teyleten Robot |
| Memory Storage Capacity | 512 KB |
| Mfr Part Number | A9 |
| Model Name | ESP32 |
| Model Number | A9 |
| Operating System | FreeRTOS |
| Processor Brand | Espressif |
| Processor Count | 2 |
| Processor Speed | 2.4E+2 MHz |
| RAM Memory Installed | 0.51 MB |
| RAM Memory Technology | [POSSIBLE: LPDDR2, DDR2] |
| Ram Memory Installed Size | 0.51 MB |
| Total Usb Ports | 2 |
| Wireless Compability | Bluetooth |
P**.
Great value boards with a few small cons
All 3 MCU's showed up in excelent condition. After installing the silicon labs update, all 3 MCU's were detectable on my PC. After selecting the ESP32 Dev Module and the proper com port in the Arduino IDE, all 3 MCU's were able to have sketches uploaded to them. Mine did not require the boot button to be pressed during uploading. I have tested both WiFi and BLE, both work without any issues. With the proper libraries OAT updates work reliably. The only cons to these boards is that they are not very (standard) bread board friendly, due to their width. It would be nice if the board could be narrowed up by one pin, so both side of the board can be accessed. Custom bread board can be used to access both sides. But, usually i side of the board is sufficient. More memory and usb-c would be great too. The cons are very small issues. These boards are an excelent value and I give these MCU's 5 stars. I would definatly buy these again.
T**Y
Works GREAT with Nano Framework and C#
This works great if you are wanting to get into C# and nanoframework on embedded processors. these have the blue led on the board on gpio2. There is almost NO documentation for this online as it's a knockoff of a knockoff of a knockoff. there is only a single jpg of the board pinout floating up in the questions that is a link to a google drive location. For a cheap start these work. Be aware that they dont have the full amount of memory so you are not going to do everything you can on a real esp32-WROVER or real ESP32-WROOM. They are trying to claim they are genuine but the laser etching on the tops is nothing like the real ones I have. And the real ones are 3X the price so I knew I was getting something cheaper. These are great to tinker with and for projects. and awesome to give to friends wanting to get started down the path of programming ESP32 with C# and NanoFramework.
R**R
Teyleten Robot ESP32-WROOM-32
Good bang for the buck. I'm using these as remote temperature sensors via ESPHome and so far, so good. You don't get any documentation with these but if you've worked with any of the other ESP32 devices like the WROVER, you'll feel right at home ('cept for this one has 30 pins - you can buy them with 38 pins, I wanted the smaller form factor). Working on making them battery powered so I don't have to keep them plugged in - I'll update this review if i run into any issues there but I don't expect any. Arduino IDE or Thonny, seems to work just fine. Pic is a test of a cheapo sensor, going to use better ones that will require some soldering, final version gets soldered to a PCB board then 3D print an enclosure for it all and test with and without a battery.
D**G
These chips work. Read my tutorial below. Not easy for a beginner, but I muddled through.
I am giving this one star to increase visibility for other new users. Your chip is unlikely defective. As a beginner I was trying to use it in the Arduino IDE via the Dronebotworkshop tutorials. Here's what I learned from there, here, and reddit. I got my chips to work. *** If you are having trouble connecting and getting errors like COM3 device error message 2 or whatever there is one more thing you have to do. But I will go through the steps in order until we get there. 1. Open the arduino IDE 2. Go to File | Preferences. Under the Settings tab look at the "Additional boards manager URLs:" There is a blank text box there. If there is already a link there, place a comma then a space after it and add the following link: Amazon asked me to remove link. Its at github and called: "package_esp32_index.json" click on "OK" 3. Go to Tools | Board Manager and navigate to "ESP32 Dev Module" and select that. You can try to run the program at that point while holding down the boot button on the esp32. That may be enough for you but not for me. 4. After some back and forth to Reddit and here I saw that on the amazon product description it says to "install the CP2102 driver or the chip won't work." They were right. lol. Mine did not. 5. Navigate to the silicon labs website and download the driver's zip folder at the following URL: Amazon asked for me to remove link. Its at Silicon Labs website I am running windows so I chose the "CP210x Universal Windows Driver v11.4.0". In my "downloads" folder I found the zip file and extracted it to a newly created folder in my "c:\Program Files\ESP32 Driver Stuff". I named it so I could find it, if disaster struck. Spoiler... it did not. I then went to "Device Manager" in the control panel of windows. I found the CP2102 UART to USB entry under the COM/LPT entry. I right clicked and updated the drivers by "Browsing" and selecting the c:\Program Files\ESP32 Driver Stuff folder that I created above. Dang. still didn't work. BUT I noticed it was now on COM6. So I went back to the Arduino IDE and Tools | Port | to COM6. "Holy Sh*t! Hallelujah! Where's the Tylenol?" - Clarke W. Griswold It worked. I hoped this helped.
J**.
Excellent ESP32 board for the price
So far, I have no complains. It is a solid construction, well packed, run as well as other ESP32 I use and the code is no problem. Happy with it!
V**Y
Works like it should
I ordered these to program them for wild and use the to power led lights strands the had no controller. They work wonderfully couldn’t be happier
C**R
Working well for prototyping
I've used all 3 as i work on R&D / product development for a small item I'm working on. The documentation could be greatly improved. This appears to have a voltage regulator (AMS1117) but I'm not sure if that means i can just hook up my battery to VIN or not..? For now I'm using an MCP1700-3302E into the 3V3 pin, but would like to eliminate this if possible in future versions. Does anybody have any insight on use of this LDO? I got this response from reddit: the dropout voltage of the onboard AMS1117-3.3 is 1.1v, so the power supply would have to be min 4.4v. Since tge battery is max 4.2v this will not work. Also I can't find details of this board such as: Antenna range Light sleep current draw Deep sleep current draw
C**S
Works as expected
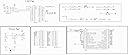
Works as expected. Im using mine for a temperature sensor for my wood stove i attached a screen shot of the spi pinout to try and save others from lots of googling
Trustpilot
3 weeks ago
2 days ago