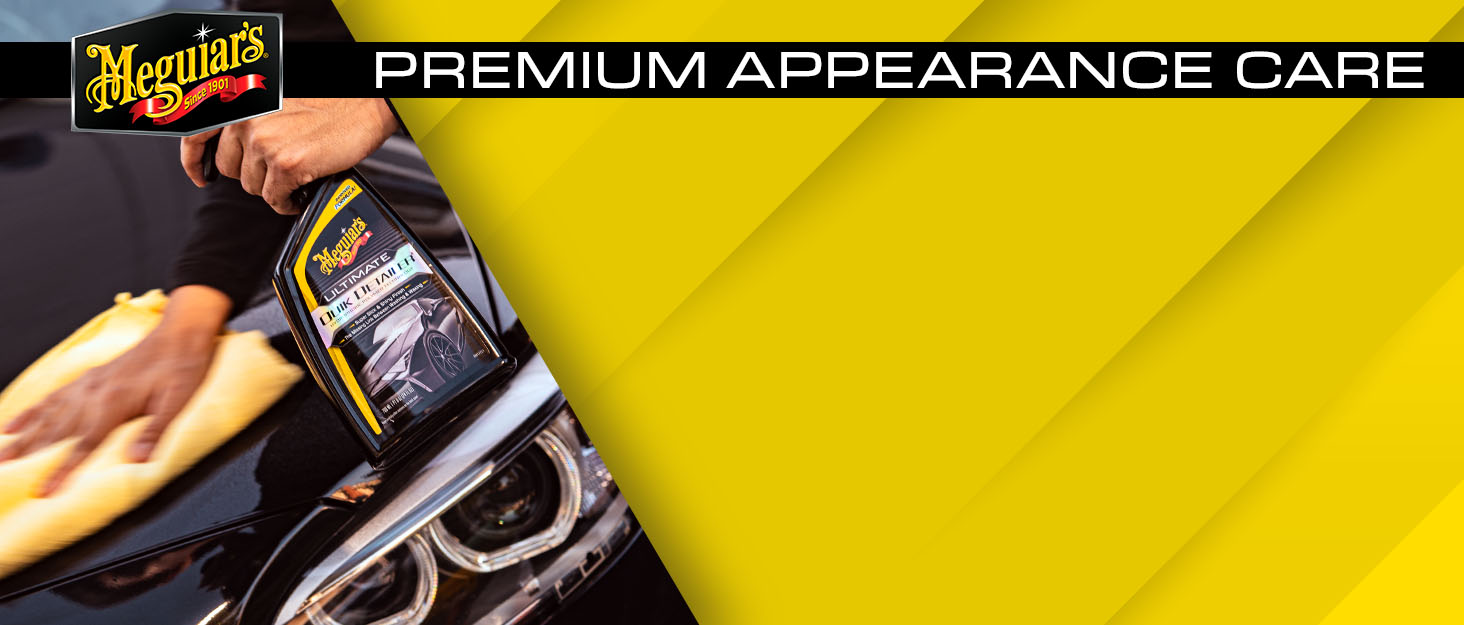
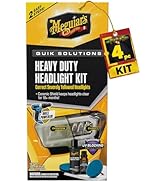
✨ Keep your headlights crystal clear and your ride runway-ready! 🚘
Meguiar's Keep Clear Headlight Coating is a 4-ounce aerosol formula that provides a durable, year-long UV protective layer to prevent yellowing and hazing on all vehicle headlights. Easy to apply with a universal fit, it restores and maintains like-new clarity, enhancing nighttime visibility and vehicle aesthetics.
Brand | Meguiar's |
Color | Keep Clear |
Specific Uses For Product | Exterior |
Vehicle Service Type | Car |
Year | 2016 |
Wattage | 55 watts |
Auto Part Position | Right |
Lens Color | clear |
Lens Material | Polycarbonate |
Item dimensions L x W x H | 7.75 x 1.86 x 1.86 inches |
UPC | 070382012656 |
Assembly Required | No |
Automotive Fit Type | Universal Fit |
Manufacturer | Meguiar's |
OEM Part Number | G17804 |
Global Trade Identification Number | 00070382012656 |
Model | G17804 |
Item Weight | 6.2 ounces |
Product Dimensions | 7.75 x 1.86 x 1.86 inches |
Country of Origin | USA |
Item model number | G17804 |
Is Discontinued By Manufacturer | No |
Exterior | Polished |
Manufacturer Part Number | G17804 |
Mirror Lighting Type | automotive-exterior-headlight-bulbs |
A**8
Save your cash, get soapy water, sandpaper, and THIS
1) the picture at the car wash shows how yellow these headlights were in March 20242) the other two on the truck are after application of the Meguiar's clearcoat3) the picture on the box on the cart was before I installed it back on the truck after all the sanding and rinsingIf you're looking at buying a $20, $30, or $40 headlight restoration kit, STOP RIGHT NOW. You don't have to buy a fancy ceramic graphene ultraclear ultimate whatever kit to do this stuff. PROCESS is more important than PRODUCT. That said, get some sandpaper, I personally like to buy the assortments of 2 inch sanding pads that run from about 400 grit on up to 3500. For this headlight, which was pretty heavily cracked over and yellowed, I started at 600, then 1000, then 1500, then 2500, then 3500. I probably could have done an even better job by including the 800, 2000, and 3000 grits, but I didn't want to take three hours to do it.Then get yourself a spray bottle of soapy water, I used about 4 ounces of Dawn in 32 ounces of water because I had it handy. Clay bar lube might actually be better here, but I don't have any of that. You'll want to use this not only to lube the surface so you don't leave gouges in the headlight, but also to rinse off all the particles of yellowed oxidized headlight coating you're removing to expose the clear plastic under it.Sand in one direction first, say horizontal. When you rinse and change to the next grade of sandpaper, switch to vertical. If you have a heavily curved light, you might want to work in an X pattern instead. Do what works best for your shape of headlight and try to use even pressure especially on the earlier rougher grits.Once you have finished sanding and have a nice clear but cloudy headlight, make sure it's fully rinsed and dried and no powder or particles of coating remain. Then tape off the surrounding area (if you didn't remove the whole light assembly like I did) and begin spraying in light coats by starting to spray off to the left side of the headlight then spraying evenly across left to right, not letting go of the sprayer until you're aimed off the light to its right. Try to overlap a little bit as you spray lines across the headlight. Once the whole headlight has a coat on, wait a few minutes to let it get tacky. Your SECOND coat will be exactly the same way but a little bit heavier on the coating. If this looks good, you can stop. If you think it needs a third coat, go ahead, but make it a little bit heavier.It is March 2025 now and the lights look as good as the day I did them October 2024. That's five months of Oklahoma red dirt, gravel dust, high winds, snow and ice for a couple days which was weird, and all the crud getting kicked up off the road by the jacked up coal rolling diesel trucks that pepper every road around here. Still feels smooth to the touch as well.Now what did I say about saving money? Right, this may be $14 right now but it goes on sale enough. $9-$10 is an OK price for this. You'll get to use it multiple times or for multiple vehicles if stored properly. Between that and some sanding pads and a spray bottle of soapy water, you'll be saving quite a bit and won't have a bunch of garbage to get rid of when you're done for some sort of single use product that costs more anyhow. Does it take longer? Yes. Is it worth it? If you like keeping money in your wallet, yes. If you enjoy the satisfaction of a job well done, yes. If you don't want to pay Walmart $30 per headlight to do it for you and have it look terrible in two months again, tes.
B**Y
Transformed Headlights with Incredible Results
Following the simple instructions and putting in a bit of extra effort, my headlights underwent a remarkable transformation. The cream performed like magic, completely rejuvenating my headlights with just a few applications. Each time I used it, the faded plastic layer vanished, unveiling pristine headlights underneath. I was genuinely amazed by the outcome and I intend to keep using it for even more impressive results going forward. The ample amount of product in the bottle ensures prolonged usage, making it a truly valuable purchase. Unlike other headlight restoration kits that require laborious sanding and polishing, this kit provides a hassle-free solution that delivers exceptional results. I highly recommend it to anyone seeking to revive their headlights without the added hassle.
S**L
Disappointing Results on My Headlights
So, this spray didn't quite hit the mark for me. It ended up leaving my shiny new headlights looking all foggy and not so great. Turns out, I missed the tiny instructions about heat and humidity on the can – like, who even sees that nano-sized font, right? Apparently, if you're in a steamy hot place like Houston, you gotta wait for those rare cool, dry days to get the best results. And let's be real, those days are like finding a unicorn around here!I guess I could've taken the headlights off and done the spray indoors, but then I started stressing about overspray and ventilation – ain't nobody got time for that! I mean, sure, the product seems solid if you believe the raving reviews and YouTube videos, but for me, it just didn't pan out. Oh well, you win some, you lose some, right?
M**R
Highly Effective UV Protectant for Various Surfaces
This UV protectant stands out with its dual types of UV protection, a fact I confirmed through thorough research on the material safety datasheet (MSDS) and insightful discussions with experts like Grok. One remarkable feature is its forgiving nature when it comes to application mishaps – unlike 1K or 2K products, fixing errors and reapplying is far from a nightmare. The application process itself was a breeze, supported by recommendations from YouTube specialists to opt for a single heavy coat, diverging from the instructions on the can. Personally, I tested this product on a Whelen light bar, where I solely used a cutting compound for preparation, and on 2015 Highlander headlights post-3M prep kit usage. While the experts may vary in their application advice, I believe you'll achieve satisfying results either way with this versatile protectant.
R**L
Transformed Headlights with Minimal Effort
Following the simple instructions and adding a bit of extra effort, I witnessed a remarkable transformation in my headlights. The cream performed exceptionally well, completely rejuvenating my headlights with just a few applications. Each use gradually removed the worn plastic layer to unveil like-new headlights. I was genuinely thrilled with the outcome and look forward to achieving even clearer results with continued use. The ample product quantity in the bottle guarantees prolonged use, proving to be a valuable purchase. Unlike labor-intensive kits requiring tedious sanding and polishing, this hassle-free solution delivers impressive results. I highly recommend this kit to anyone seeking headlight restoration without the unnecessary hassle.
M**M
Extend the Lifespan of Your Headlights with Meguiar's Keep Clear Coating
I am absolutely amazed by Meguiar's Keep Clear Headlight Coating! It acts as a protective shield, ensuring that your headlights maintain a fresh, new look for an extended period. With this product, wave goodbye to issues like oxidation and yellowing, as it offers year-long protection. The application process is a breeze - incredibly simple and stress-free. What's more, it is conveniently packaged in a 4 oz aerosol can, adding further ease to the entire experience. For those seeking a straightforward and efficient way to preserve the clarity of their headlights, I can't recommend this product enough. Trust me, give it a shot, and you'll be delighted with the results!
Trustpilot
4 days ago
2 days ago