Description
🖨️ Clean Prints, Clear Wins: Don’t let clogged nozzles slow your workflow!
- TRUSTED SINCE 2008 - Backed by years of expertise and reliable customer support
- EFFORTLESS DIY MAINTENANCE - Simple step-by-step instructions for quick, error-free cleaning
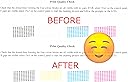
- UNBLOCK REVIVE INSTANTLY - Clear stubborn nozzles and fix streaky prints in minutes
- UNIVERSAL INK COMPATIBILITY - Works seamlessly with dye, pigment, sublimation, and edible inks
- KEEP YOUR PRINTER PEAK PERFORMING - Avoid costly replacements and downtime with regular care
The Printhead Hospital Printer Cleaning Kit offers a 5 oz solution designed specifically for Brother MFC DCP printers. Compatible with multiple ink types including dye, pigment, sublimation, and edible inks, this easy-to-use kit unclogs nozzles and restores print quality quickly. Established in 2008, it comes with comprehensive instructions and UK-based customer support to ensure hassle-free maintenance and prolonged printer life.