We remain fully operational. Our teams are working around the clock to ensure your deliveries continue safely.

DOWNLOAD THE APP


Customer Services
Copyright © 2025 Desertcart Holdings Limited
DOWNLOAD THE APP
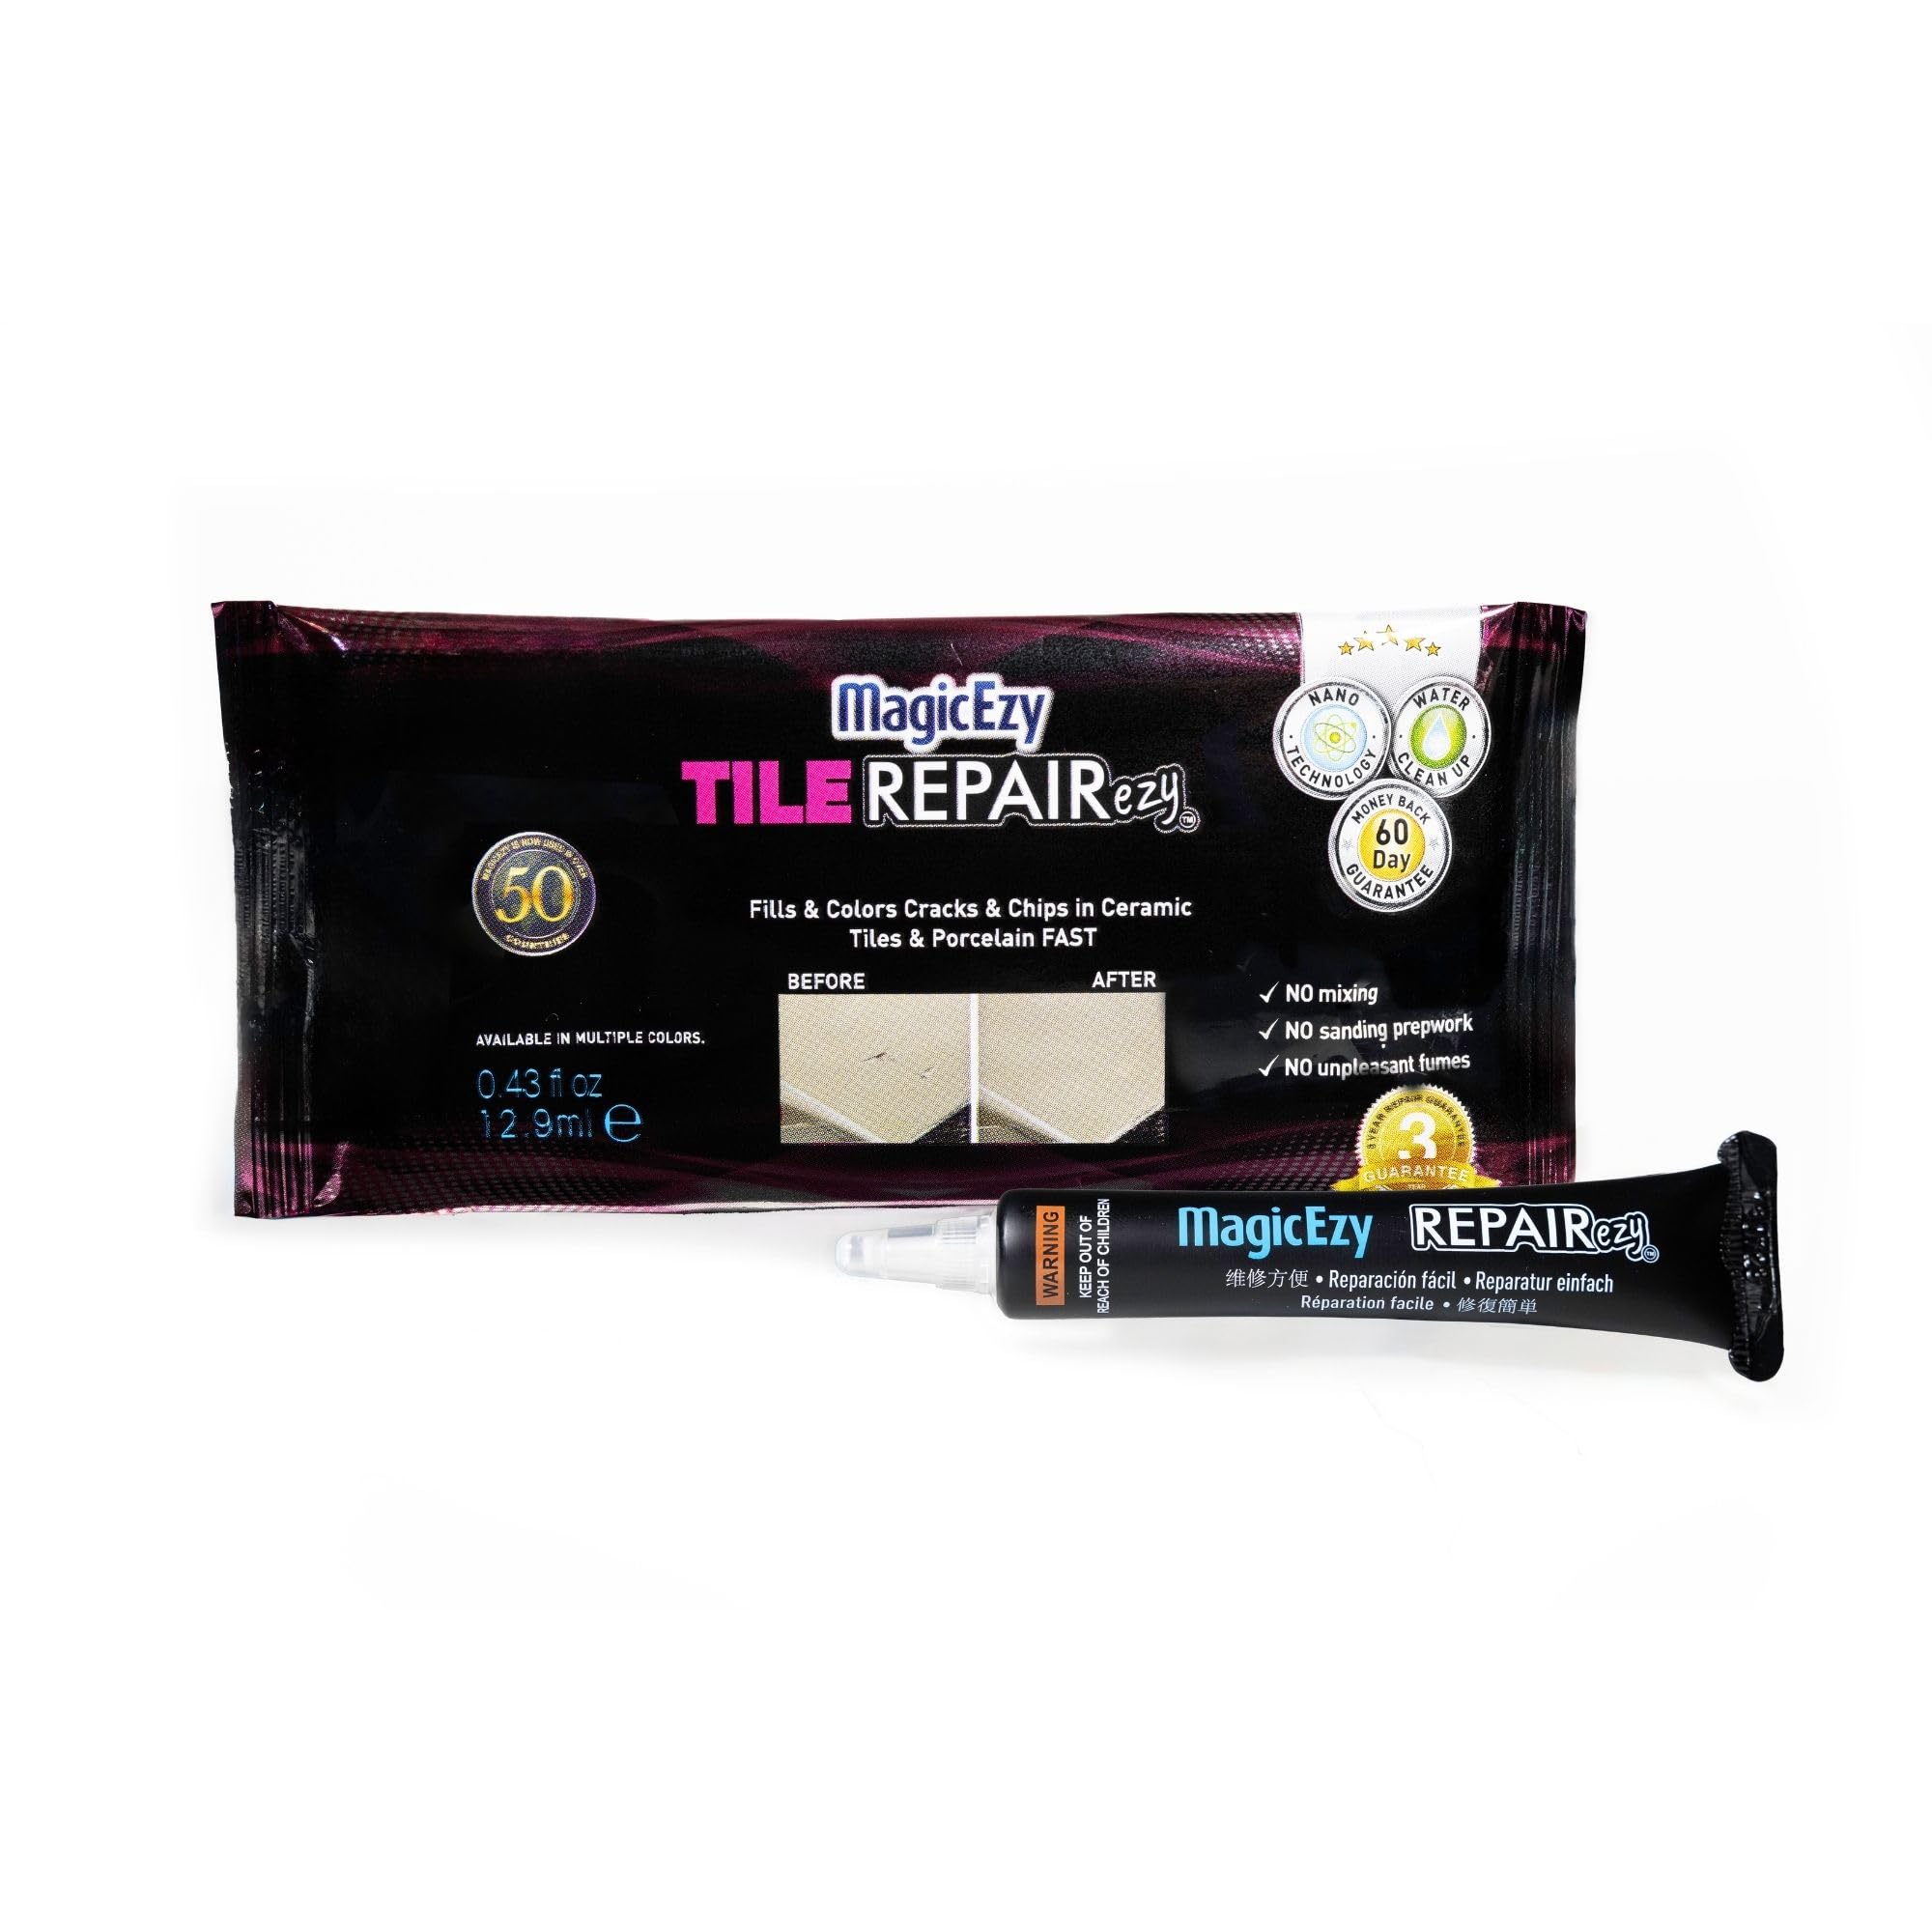
🛠️ Repair smarter, not harder — tile fixes that last a lifetime!
MagicEzy Tile RepairEzy in Honey Beige is a premium ceramic and porcelain tile repair kit designed for quick, durable fixes on bathroom floors, countertops, and more. Featuring a no-mix gel formula with nanotechnology for structural adhesion, it seamlessly fills cracks, chips, and scratches while matching off-white tones perfectly. Lightweight and easy to use, it offers lifetime protection and versatility across multiple surfaces including granite and marble.


| ASIN | B07RH8C8G7 |
| Batteries Required? | No |
| Batteries included? | No |
| Best Sellers Rank | 7,948 in DIY & Tools ( See Top 100 in DIY & Tools ) 34 in Tile Grout |
| Colour | Honey Beige |
| Customer Reviews | 3.7 3.7 out of 5 stars (6,296) |
| Date First Available | 2 May 2019 |
| Item Package Quantity | 1 |
| Item Weight | 12.2 g |
| Item model number | 12345 |
| Manufacturer | MagicEzy |
| Material | Acrylic |
| Part number | 12345 |
| Product Dimensions | 12 x 2.5 x 1 cm; 12.19 g |
| Style | Enamel |
P**R
good job
does a good job
A**R
Worth the effort
Was a bit messy, but did the job decently in the end
N**I
Okay to stop cracks getting worse
Didn’t camouflage as well as I’d thought on my tiles, but it has filled the chip and will prevent it getting worse
C**R
Used properly it's excellent
I was doubtful when I read some of the reviews. We had a deep hole in our floor tile and were told by professionals that it was not repairable. I think the trick is many thin layers. So far I have put on 3 layers and will probably need another one. I kept the layers thin and left it to dry naturally for at least 3 days before adding the next layer. As long as you give it time to dry properly it is excellent stuff. The tubes are small but I had plenty for a deep whole about 3cm by 2cm. Even buying a second lot is cheaper than having the floor retiled.
M**H
Complete waste of money
I have a small chip in one of our floor tiles and was going to just use regular, clear 2 part resin but thought I would try this first especially as it's specific to tiles. Application is pretty straight forward. Shake the tube for 2 minutes to mix the resin however this is also supposed to thin it to make it easier to apply. Viscosity was unaffected by shaking but for my purposes it didn't really matter. Apply the resin to the chip and smooth out. I actually used a Stanley blade to smooth it out and managed to get a very smooth finish. However, even after 2 weeks the resin never seemed to fully harden. It pulled away instantly and was the consistency of a soft rubber/gel. A complete waste of time and money. I have now filled the chip with the 2 part resin I was initially going to use and the results are reasonable if not perfect. Probably as good as I'm going to get without paying for a specialist to repair it. I have seen some on-line tutorials where they've used porcelain varnish so maybe that would have been a better option.
A**E
Good colour match
Bought from seller previously and product works perfectly. Follow instructions on the packaging and you won’t go wrong, conceals damaged area that it difficult to notice. Advise to take photos of colour of tile to find a good match
M**H
Very disappointing
Very disappointing 2 tiny tubes which won’t do more than a couple of tiles very expensive for what you get
J**H
It works. Hard to match colours.
Detailed instructions. There is very little time to work with the mixture so you need to prepare everything for immediate application. The instruction to mix colours in a plastic bag is not practical as the mixture spreads out in the bag and becomes hard to work with. I mixed on a small plate instead. I bought the black and white kit to make grey but discovered that my grey tiles had other tints in them -? brown. The colour i got was not an exact match but usable. It would have been hard to get an exact match without spending on a lot of colours and making up test batches first. Expensive and you get a pretty small amount but worth it if you can manage to get a good enough colour match.
I**N
This product is amazing! I was ready for disappointment since it was my "another" choice to fix my kitchen tiles, but it turned out to be the PERFECT ONE! No mess, easy to apply, and completely effective. It fixed my tiles perfectly, and I’m so happy I found it. Absolutely yes!
A**H
Used this in 3 cracks in my porcelain tile. I pitched the grey/white combo as my tile is a mottled light grey. Easy to mix to get a great match. The patch has a bit of sheen to it so when the sun shines just right it is noticeable on my mat finish tile but not one but me would ever notice. The cracks are just about completely invisible. You have to really look to find them. Highly recommend this product.
A**L
روعه جدا انصح فيه شكرا للبائع 👍🌹🌹👍👍🥰🇸🇦
S**S
This looks like a tube of liquid concealer and was about the same consistency. It was simple to apply to a crack that had run through 4 tiles. The larger end is still slightly noticeable after repair, probably because of my color choice, but the hairline ones have virtually disappeared. I literally have to get down on the floor and run my fingernails over the tile to find where it was cracked. Even the larger crack isn't immediately obvious. I'm pretty pleased with the results for the price!
H**G
I believe the reason this product doesn't better reviews is because there's a learning curve to it. And color matching is not easy. That said, we have some generic beige/grey ceramic tiles in our kitchen that have been nicked and corners chipped from 40 years of use. Instead of replacing it for a home sale, we decided to do a repair. Glad we did, the product is viscous enough to fill in pretty decent size chips, for hairline cracks and other nicks, don't be afraid to put product in and use ur fingers to fill it in good. then use a wet paper towel to clean around the edges. The product will shrink about 25% when fully dry so you'll need to do it at least twice. In terms of color matching, the beige/white kit I bot worked perfectly, the trick is to put the beige in first and then with a toothpick take a small dab of the white and mix it in little by little till you get a match to the surrounding area. Takes a bit of practice, but the product works perfectly. If you have matte tiles, take extra fine sandpaper when fully cured after a week and swirl it .
Trustpilot
2 weeks ago
4 days ago