


🛠️ Fix it like a pro, restore like a boss!
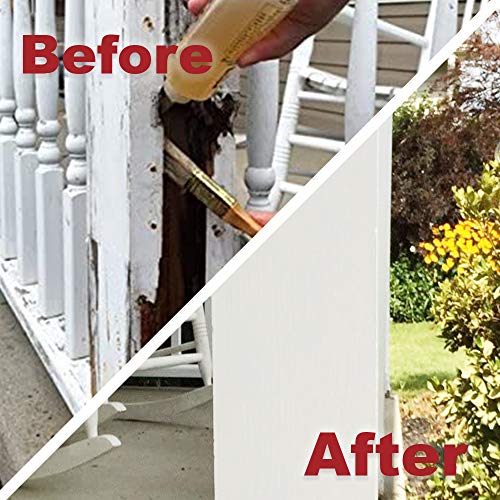
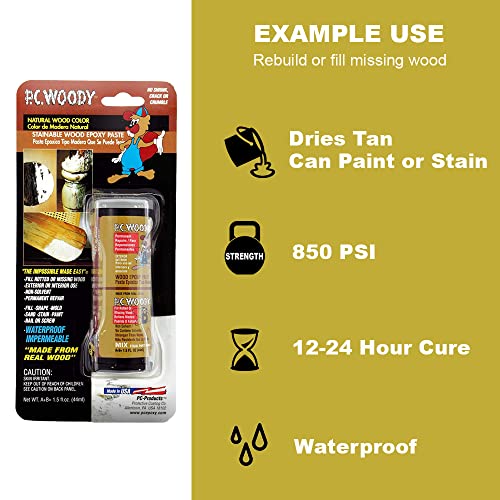
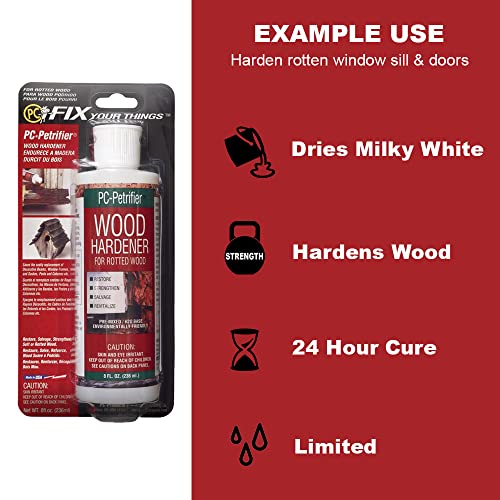
The PC Products 84113 Rotted Wood Repair Kit is a comprehensive, water-based 3-part system designed to restore and reinforce rotted or damaged wood. Made in the USA by a trusted brand with 75 years of expertise, it includes a wood hardener, two-part epoxy paste, and moldable epoxy putty, plus all necessary tools for precise application. Repairs cure in 24 hours, sand smoothly, and accept paint for a professional, long-lasting finish—perfect for millennial DIYers who demand quality and reliability.


| ASIN | B008DYN7WS |
| Best Sellers Rank | #434,867 in Tools & Home Improvement ( See Top 100 in Tools & Home Improvement ) #470 in Wood Filler |
| Date First Available | September 14, 2004 |
| Is Discontinued By Manufacturer | No |
| Item Weight | 1.2 pounds |
| Item model number | 84113 |
| Manufacturer | Pc Products |
| Product Dimensions | 7.25 x 4 x 4 inches |
J**C
Very useful wood repair product
I had some damage to the exterior of two wooden window frames, from a squirrel chewing away at the wood, trying to get inside. This product worked very well to repair the damage. The kit is extremely complete and the instructions are easy to follow. A few notes: The PC-Petrifier is a very watery liquid, so it tends to run and will leave a slight mark (once it dries) if it runs on to undamaged wood. After a final sanding, however, I didn't notice these marks any more, but don't let it run onto wood that you won't be refinishing. The Petrifier is water based, so you can wash out the small flux brush that they include and reuse it. The two-part epoxy was easy to mix, because the two parts are two different colors, and you keep mixing until it's a uniform blend. The result is the consistency of sticky peanut butter. If you can imagine applying sticky peanut butter to your damaged wood, it's not so easy to get a smooth uniform coating. If you are repairing deep or widespread damage, plan on making multiple applications (I did them one day apart, to allow curing) instead of trying to do it all at once. The first application might just be to work the epoxy into all the nooks and crannies so it adheres well, which requires some pressure with the putty knife. Even for the final application, it will be hard to get a very smooth and uniform finish, so plan on doing some sanding after the final cure. By the way, if you want to reuse the mixing board they provide, use a paper towel to wipe off the epoxy before it cures, which leaves the board almost like new. You can even wipe off and reuse the mixing stick. I used a Surform tool for rough sanding, and regular sandpaper for final sanding. I should say that I have the carbide grit Surform tool, which is very aggressive, and it still required some work to get rid of the bumps and waviness in the cured putty. It wasn't an excessive amount of work, but it did require some "elbow grease". When I finished sanding, I saw a couple of small voids in the surface where I missed with the final putty application. This is a good place to use the other epoxy putty in the kit, the tube of kneadable putty. Pinch off a little blob of putty, knead it well to mix it (wear latex gloves), and work it into any voids to fix boo-boos. The cured epoxy holds paint well and when I was all done, the repair looked great!
S**M
Worked great for this novice.
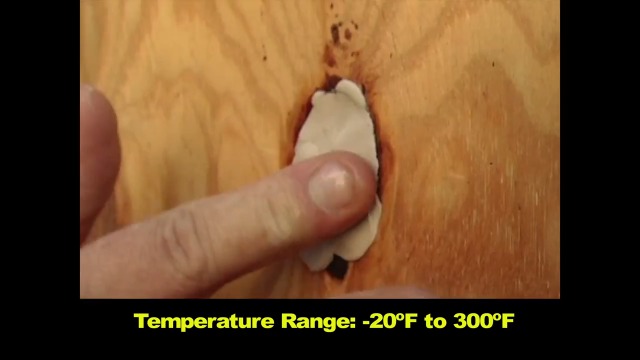
I want to start by saying I am a complete novice and am trying to learn how to do some repairs around my own house to save money. And I loved this product. I bought this to repair some porch floor boards that had some big (10-18 inch x 1 in) splinters missing. A few boards also had rotted ends that had splintered up and looked really raggedy. I didn't want to replace the boards because of the expense and extent of the work that would have been required to do so, but I wanted the boards to look better / more complete for repainting. I used the PC-petrifier to harden up and preserve the underlying wood in the areas that I needed to replace. After 24 hours I then used the PC-Woody to rebuild the ends of the boards and to fill-in and rebuild the missing splintered areas. In some of my deep cracks / splintered areas, I had to place a second layer 24 hours later as it did shrink a little. I probably could have skipped doing this, the shrinkage was barely noticeable, but I tend to fuss with things until I think they are perfect. After 24 hours the repairs seemed cured, so I sanded the repaired areas a tiny bit by hand and then painted it. The paint went onto the repairs beautifully. If I didn't know where the repairs were, I don't think I could pick them out. My only problem was mixing the PC-Woody up. It is a two-part epoxy that must be combined 1:1. I used a scale to make sure I was doing 1:1 accurately by measuring onto the tile provided in the kit. Because my repairs were so extensive, I had to use almost all the material in both jars and the tile was really too small for mixing up that much of the product. For small repairs it would be fine but I suggest using a bigger tile or piece of plastic to mix the epoxy on if you are using more than 1/4 of the jars. The directions describe the consistence of the mixed epoxy to be like that of peanut butter and I would say that this is accurate. It was not too hard to work with. I actually found that filling in the larger areas roughly and then waiting 5-15 minutes for the material to set up a little and then going back and shaping and smoothing was easier than trying to get the shape perfect while the epoxy was still really soft and sticky. After waiting for it to firm up a little, I used my gloved fingers to press and smooth the epoxy into the shape I wanted and touched up with the putty knife to smooth it level with the neighboring boards. I am very pleased with this product and am planing to buy a separate set of the PC-Woody to repair some rotted windowsill interiors that I have.
D**N
Stong and flexible solution to small problems
This is not a kit you would use to repair structural damage. It's perfect for cosmetic or small repairs. I had some local rotting on a window sill and another hidden spot on our side door frame. I cut out the bad wood with a chisel, cleaned the area, FOLLOWED the directions carefully, and was very happy with the results. I emphasized following the directions because it's important. While this isn't rocket science, you do need to use the components correctly to get the desired results. If you do, and you allow the epoxied repair to cure, you can do anything you would normally do with wood. Sand it, paint it, drive screws or nails through it - it is at least as strong as the wood around it. Just make sure you clean out the bad stuff and use the petrifier. Personally, I like to chisel out the bad stuff and know that it won't come back to bite me later on. A useful addition for any homeowner and DIYer.
R**A
Cumple con su propósito sin embargo es una cantidad muy pequeña de producto, sin embargo cumple con su función.
J**O
I used this product to fix rotting areas on wood windows and it was easy to use with great results.
A**A
Easy to use and good product.
A**R
I followed the instructions and it worked great. It was the right amount to do one 3 foot window sill that had a significant amount of wood missing from dry rot. I didn't give it 5 stars because I just did it. We will see what happens after it experiences a -30C winter.
P**9
Excellent products, did exactly what I wanted. Easy to use. I avoided window replacements, saving '000's -at least for now.
Trustpilot
3 weeks ago
3 weeks ago