Deliver to Finland
IFor best experience Get the App
✨ Reimagine your sink—glossy, fresh, and flawless in a day!
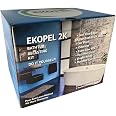
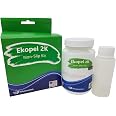
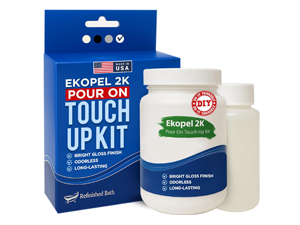
The Ekopel Pour On Sink Refinishing Kit is a professional-grade, odorless, and eco-friendly DIY solution designed to restore sinks, tubs, and showers with a durable, glossy white enamel finish. Made in the USA, this all-inclusive kit features step-by-step video guidance and cures in just 24 hours, enabling renters and homeowners alike to achieve a like-new surface without hiring experts.
Brand | EKOPEL Refinished Bath Solutions |
Color | White |
Finish Type | Gloss |
Size | 1 Count (Pack of 1) |
Item Volume | 8 Fluid Ounces |
Special Feature | Odor Free |
Unit Count | 1.0 Count |
Paint Type | Oil, Enamel |
Specific Uses For Product | Apartment,Bathtub,Showers,Sink,Sinks |
Surface Recommendation | Shower,Sink |
Indoor/Outdoor Usage | Indoor |
Item Form | Epoxy |
Included Components | Foam Roller, Material Scooper, Ekopel 2K Enamel |
Is Waterproof | False |
Package Information | Can |
Color Code | #000000 |
Full Cure Time | 24 Hours |
Coverage | 10-12 square feet/gallon |
Water Resistance Level | Water Resistant |
UPC | 746729139040 |
Manufacturer | Pabrec Ekopel USA/RB Solutions Ekopel Refinished Bath Solutions |
Item Weight | 3.87 pounds |
Style | Sink Size Kit |
Finish | Gloss |
Material | oil based |
Special Features | Odor Free |
Batteries Included? | No |
Batteries Required? | No |
C**N
Quite Awesome! ... If you do it right
I will preface this with I think the product is really great. I like it. If it works longer term, it was a lot cheaper than the cost of a new, good quality sink. Or bought me time. I'll try to post updates to longevity, mostly because I think there's something good to this product. You just need to do it right, and it is pretty specific.The smell during the project (to me) was no worse than painting and didn't bother me. The finish is BEAUTIFUL. It seems like it will be sufficiently durable. I used the Ekopel pour on sink kit for my kitchen sink. I'd never worked with epoxy, and I had no idea what I was doing other than from watching videos and reading up. I saw some people that sounded like they were in the same predicament that I was and they had success, and the videos seemed helpful and made it look very doable. I had to have instructional help with how to remove the plumbing and hardware, so I'm not super handy. You don't have to be handy, just pay attention to detail. Don't be afraid to give it a go!My main reason for this review is I want to share some things I learned, especially if your not handy and new to Ekopel/epoxy. I did this project twice - user error and pets. I honestly believe I could have done it right and well the first time if I had done a few things better. So...1. Follow instructions exactly. Watch their videos. Seems like some who had issues were not following steps or trying to take shortcuts. I had the ambient temp right, removed hardware, used harsh cleaners to try to make sure the sink was cleaned and stripped of oils, then followed with the toilet bowl cleaner (yes, do rinse well, one reviewer wasn't sure), mixed by hand for the time periods specified, etc. Where I went wrong, I'm not entirely certain. I'm guessing I didn't have the surface as clean as it should have been, maybe didn't get all the toilet bowl cleaner off? They say you don't need to sand but sanding seemed to help me. My first pour was looking pretty nice other than a few uneven adhesion spots, and one spot where I messed with it too long. But it wasn't awful... until the cat escaped. If I were doing it for the first time again, I'd probably sand the surface just improve my chances of a good finish.2. Control your environment. I have pets. The dogs were pretty well isolated away from the project and for the first few hours after. Though my sink was still installed that time and the dogs couldn't reach it, pet hair still travels. If you have airflow, dust travels. So if you can isolate your work area, do so. If you held a pet that sheds, change clothing. In the beginning, the product is forgiving and self leveling and you can fix some things, but you don't have long before you just can't. My first pour, I poured in the evening then I woke up the next morning with a few beautiful cat paw prints in the bottom of my sink, deep enough in the Ekopel that it would be a problem (Ekopel is thicker). I tried a touch up kit, probably wasn't designed for what I was doing, or I used it wrong. I didn't find many videos on the touch up kit.3. Do the project quickly then walk away. Don't mess with it too long after pouring. It does level quite nicely at first, so you can take some time to make sure you get good coverage. You have a little time at first to get any dust specks out. A tiny fly landed early in my second pour and I fixed it without issues. If you mess with it too long though, you will not have a good looking project. That said, do make sure you get good coverage. Second pour I used the roller to cover all surface areas and push the Ekopel up the sides and top/saddle of the sink for 5 - 7 minutes. There was nowhere the roller didn't touch. Then went to bed. I think if I were doing a bath surround, I'd get someone to do it with me to reduce the time.3. Sanding and (hopefully never, reapplication)... You can reapply - it will adhere to itself. Just let it cure a few days, sand it down with 220 grit, or 180 even, in spots you need to. You don't need to re-do the cleaning part. Word of caution, make sure any sanding is done really well. You want an even surface. Couple spots on my second pour, I didn't get it well enough so there's a little bit of bumpiness. You can see it on the saddle and the one side of the sink. (The rest pretty much is light/shadow reflections like my light covers) The saddle I had to fix a couple chips in the sink and I didn't sand that as smoothly as I thought I did. If you repair some chips, sand and feather it well. Don't rely on self leveling too much.4. Taping... I taped my counter really well. Do tape out further than you think you need, or get something to cover surrounding surfaces by 4-6 inches. Last thing you want is to worry about spilling beyond your prepped area in the middle of pouring. If that does happen though, Ekopel does come off. I used baby wipes while it was wet. My problem is I waited too long to take it off and it hardened. The ekopel that spilled on the tape made it so I could not pull it off. If it was a very thin layer I was ok. Ekopel is thick though. And the way I did the pour (user issues probably), it was thick enough and dried enough that I had to chisel it off the counter. I guess that testifies to some aspect of durability? Not sure the timing of taking the tape off so you have a good edge on something like this sink but don't have overspill. Second pour, I pulled the sink out completely so I didn't have to worry about that. Now, I can't imagine doing it any other way. (Make sure to keep the sink appropriately leveled so the drains are lower than the bottom of the sink.) I would never try Ekopel with the hardware attached, but that is me. I guess if I were trying a bathtub I'd try to get below the line where hardware would cover, then sand if needed.5. Remove the hardware and separate from drains. Or block the plumbing REALLY well. It will ruin pipes, guaranteed! After the drips pretty well stop but before it hardens, under your sink you're going to want to carefully wipe those drip spots if you can. If not, you'll be sanding/grinding down around the edges of holes so you can reattach the hardware/drains. It WILL leave drip spots (see picture for a couple I didn't wipe). And they're hard to smooth out. After my first pour, I ended up chipping those off with a screwdriver and still needed to sand down.I haven't reinstalled my sink yet so maybe I'm early in reviewing. When doing my first pour, somewhere I saw a recommendation to wait 7 days before leaving shampoo bottles on a tub so I'm waiting a minimum 7 days before reinstalling. Twice was more than good enough for me. Just today I saw up to 30 days cure time. The picture is of the sink just 24 hours after pouring. The surface is hard enough to touch, but Ekopel that dripped on paper plates, I can bend both the plates and Ekopel a bit without breaking or popping it off the plate, so it isn't hard enough yet. Not sure if I would trust 36 hours to be long enough? My house temp has stayed between 74 and 78 (not running heating nor AC).Would I do it again? Yes, especially if this holds up in good shape for even 4-5 years. But I'd do the prep better the first time. Thus far, so excited this has turned out as well as it has in the end!
L**H
OMG make sure you buy this! Best stuff out there!
We used this to finish an old cast iron double bowl kitchen sink and drainboard. ( Also, an old claw foot tub with the purchase of a second bath kit )This stuff is amazing! There is no smell! That right there is worth it!This sink and drainboard had not been done over in a very long time and when it was, it was always a quick spray paint or cheap kit. The cast iron was visible in a large section of the bottom on each side ( sink side and washing machine drain side ). It was in pretty rough shape and we did not fill it in, in either section. We did do a light sand of everything before cleaning with the etching toilet bowl cleaner. Looking at it now, you would never know the cast iron was showing! We are not professionals, but we do a lot of our own DIY repairs to our own home and a relative's home.We refinished this sink and drainboard for someone while they were away, they cried when they saw it and thought we had installed a different/new one. This stuff is thick, white, and shiny . . . and probably better looking than when everything was new!The best advice we can give . . . to watch the videos on application, read the reviews on the product ( a lot of mistakes are obvious and clear - avoid them, and knowing about them will help you to avoid them! ), read the reviews for recommendations, ( but only if they adhere to the instructions! ), read the instructions, read the instructions, again and again, do not stray from those instructions! If you care about a flawless finish make sure wherever you do the refinish is dustproof, also we found it was best to disconnect the drain ( if possible do it, it is so much easier than babysitting the product/drain! ), make sure to take care and not over mix the product! Also, if you can't remove your fixtures ( faucet, handles, etc . . . )( again, much easier with them out of the way ) make sure you tape them off really well ( the etching toilet bowl cleaner might damage your fixtures/finish ).We replaced the faucet and it came with a sprayer, which this sink had never had before. After the curing process was finished we actually had to drill a hole in the sink for the sprayer hanger. We encountered no problem in doing so, no issues with the finish around the freshly drilled hole. Someone not knowing what the sink looked like originally would think the sprayer and the holder were original to the sink.Good luck, it is worth it, and remember you get what you pay for. Cheap=cheap / low quality. This is not either of those!Also, just a note my pictures of the sink due to lighting ( and my phone cropping probably didn't help either ) look slightly yellow, it is very white just like the drain board.Edit to add ( 6/19/22 ) Coming up on 1 year for the double cast iron sink, drainboard, and claw foot tub. They all still look " brand new " and our relative still raves and admires the product/job!
J**S
Great product, works exactly as advertised
100+ year old cast iron corner sink in small bathroom off kitchen. Badly damaged porcelain from someone using some harsh chemical in it years ago.I decided to try this product and it worked GREAT! Took much longer to prep than apply. Cleaned sink per instructions and sanded it to take off glaze (in the few remaining areas that were shiny). Masked it off, removed all chrome fixtures and drain and taped a drop cloth under sink to catch drips and product draining out of sink once drain dam removed.Be very sure to mask off to ensure that product cannot pull small bits of debris out of crack around sink or tub where caulk was removed - I was not careful enough on this and some grit got pulled in and I had to pick it out with tweezers. but that was my fault.Other than that it worked great. Easy to use. The "self leveling" description is dead on. As bits of grit showed up I would pick them out and the resulting divot would fill back in and disappear.Looks brand new and finish feels very tough and hard.
M**E
Easy to do as long as you take your time!
I did not like that the instructions were not written down but were a QR code that took you to a website. I do like the videos that guide you from the website. Please watch the videos before applying. It took time and patience but was actually easy to apply. I bought the sink kit to apply to a 1937 Cast Iron pedestal sink. The kit covered the sink AND the pedestal but I put bright white over antique white so dramatic changes may need more!
Trustpilot
1 day ago
2 weeks ago