
Desert Online General Trading LLC
Dubai, United Arab Emirates
Desert Online General Trading LLC
Dubai, United Arab Emirates

🔧 Build, Learn, and Shine with Every Tick!
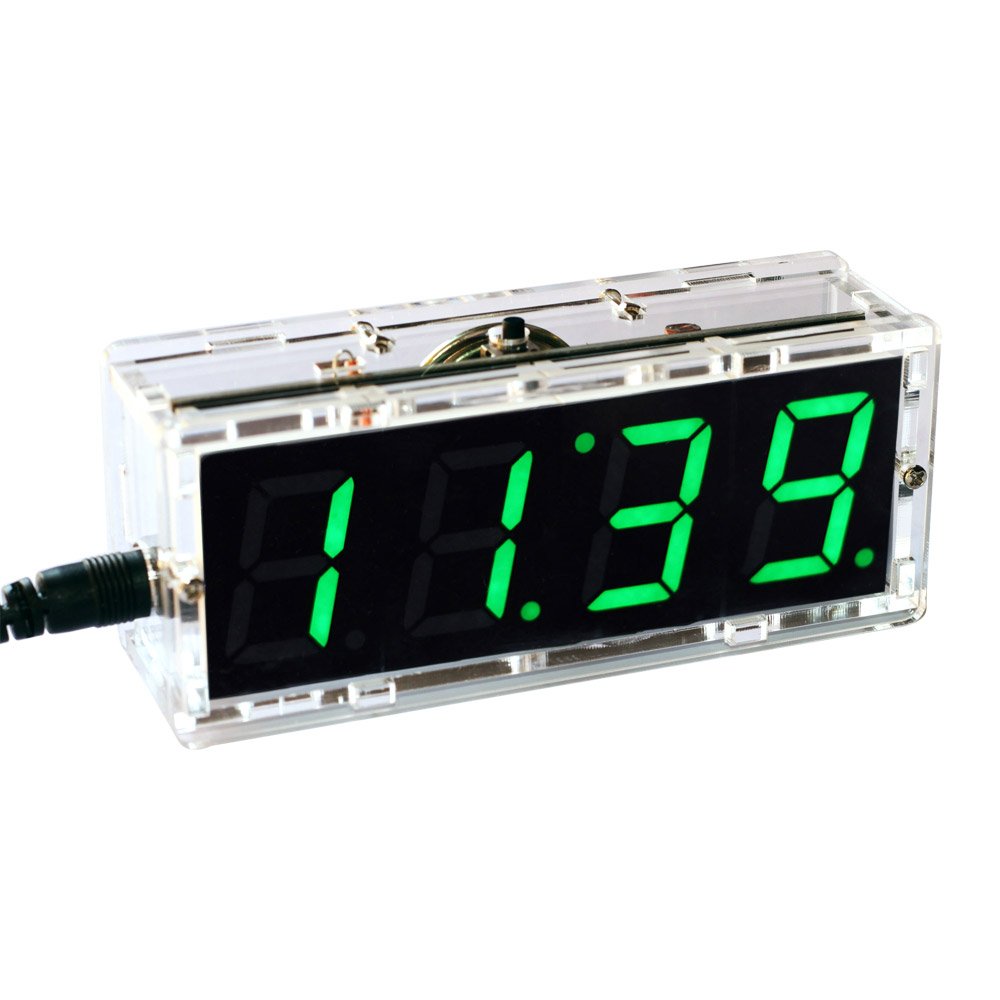
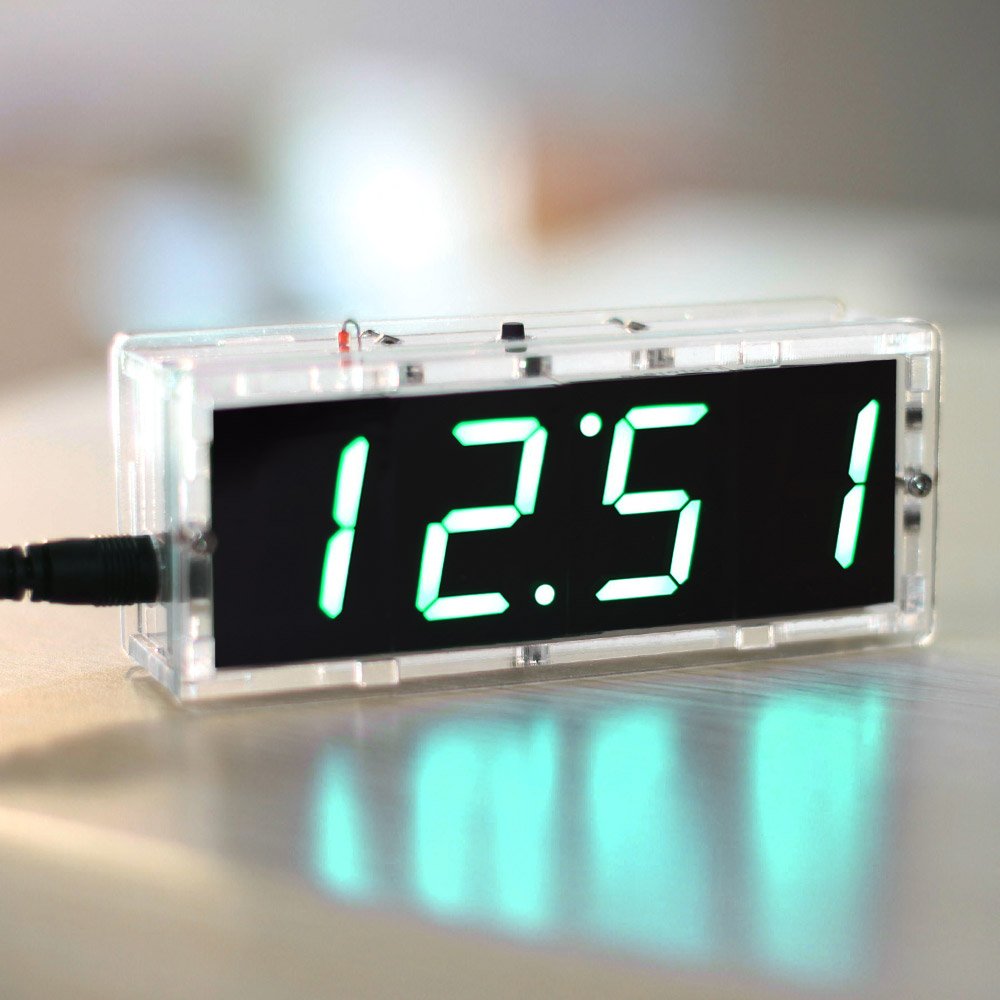
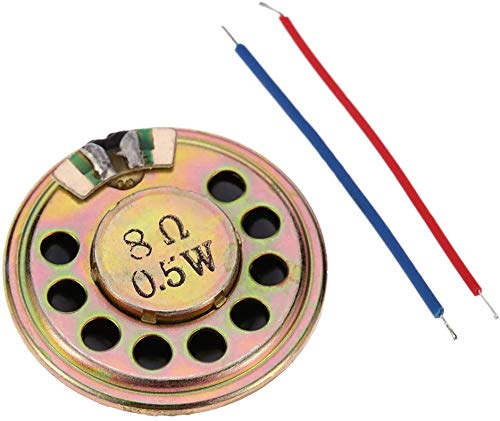
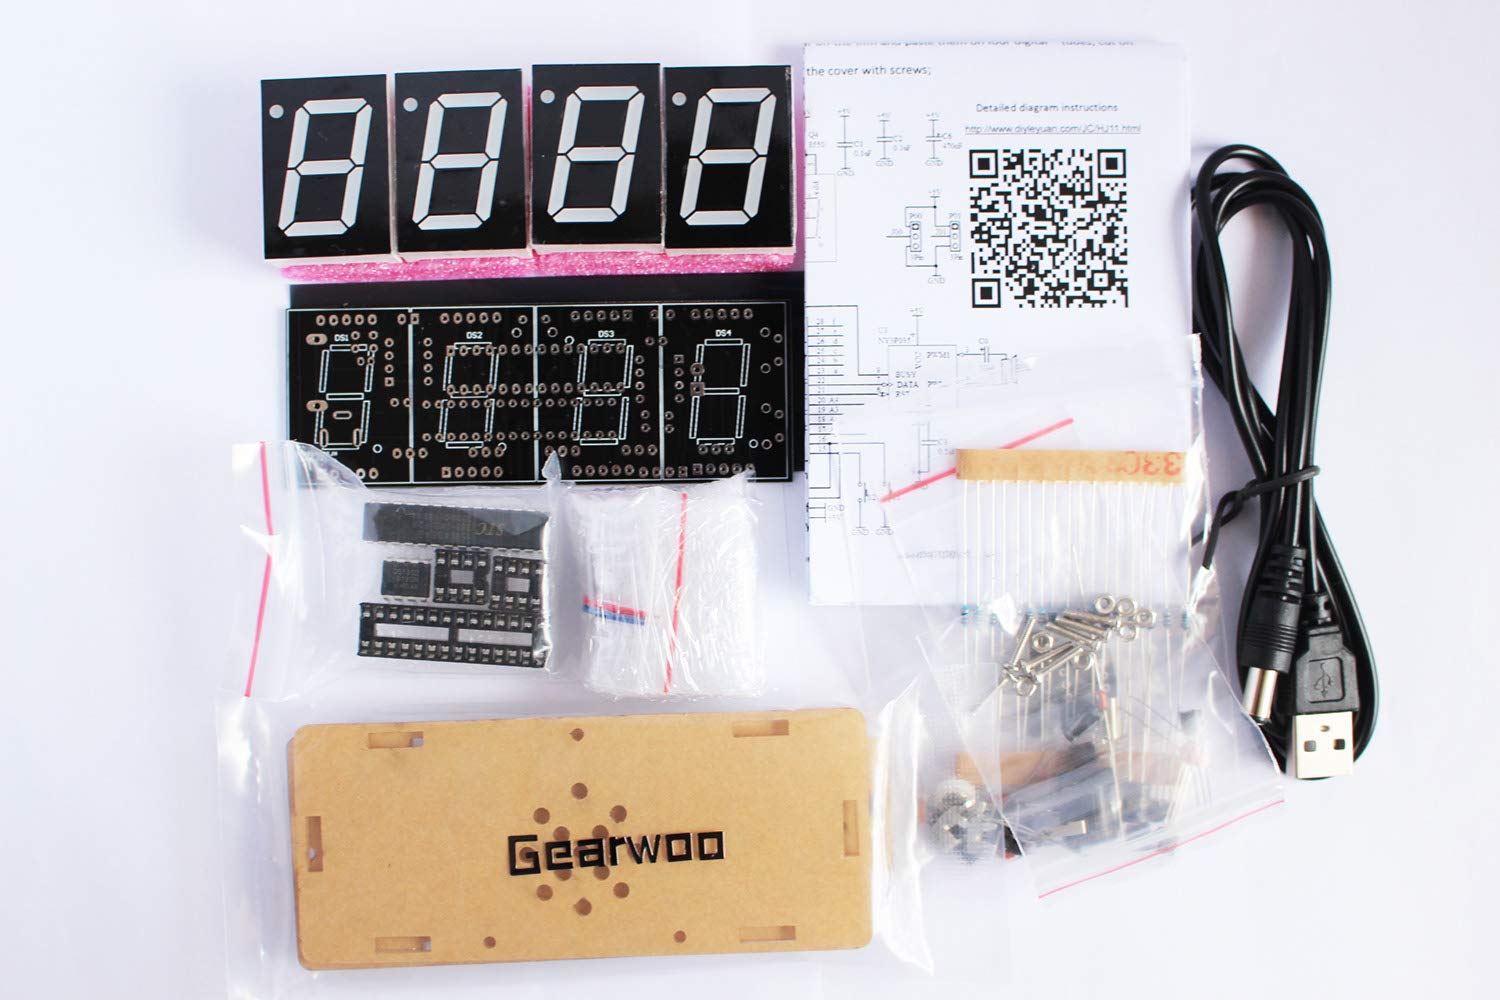
The Soldering Project Kit is an engaging DIY electronic project designed for those with a foundational knowledge of electronics. This kit includes a 4-digit LED clock with a speaker, allowing users to practice soldering while learning about timekeeping functions. With a transparent case and USB power capability, it’s perfect for educational settings or personal projects.
| Package Dimensions | 13.4 x 11.8 x 3.6 cm; 141 g |
| Manufacturer reference | Gearwoo |
| Educational Objective(s) | Literacy & Spacial Awareness |
| Batteries Required? | No |
| Batteries included? | No |
| Material Type(s) | Polycarbonate |
| Colour | Green 1 |
| ASIN | B085B49TRQ |
M**N
Fantastic Useful Soldering Project Kit
This was the first soldering project kit I have built. It is relatively easy to put together as a complete beginner. The instructions are not bad but there are plenty of videos on Youtube and there is a downloadable manual in Chinese using a QR code but this is useful for some colour photos.It took me an afternoon to construct before testing and it worked straight away. I forgot to order the backup battery so couldn't fully complete. I would think if you had a problem on switch on that it would be difficult as a novice to diagnose a problem and it would be very difficult resolder any joints once the numbers are soldered on.This kit has the bonus of a speaker and on a button push it speaks the time too.Setting the clock and various functions is a bit vague but after 2 or 3 attempts I had the functions sussed out. This kit has the ability for different display options such as clock only, clock and temp cycle or clock, temp, date and day cycle. There is an alarm and there is an hourly chime option both of which can be switched on and off.I really enjoyed constructing this kit so will definitely look for more kits such as calculator, watch, led decorations and 8x8 led cube to work on my new found skill of soldering.
A**T
Well... Would've been ok.
The lights, voice and function work, but the + button is inoperative.The fact the time never changes from 12:00 to 12:01 even when left as a clock is the only real issue I can detect. Meaning faulty code or chip.
Q**R
Fun but doesn't work properly
Fun to make, good for practice, but does not work properly.
A**R
Great little kit I learned a lot.
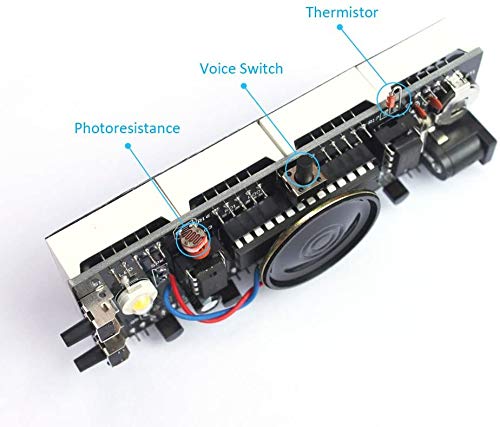
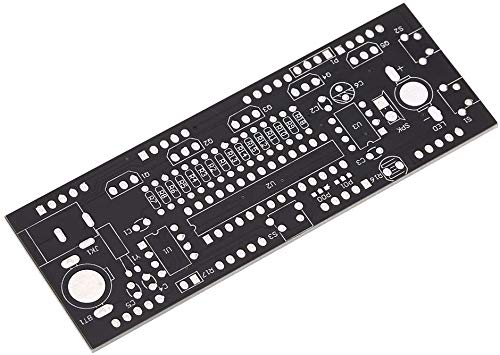
I’m quite new to both electronics and soldering, however I was able to assemble this project in about 3 hours.The instructions are far from clear but using logic, guess work and a multimeter I was able to work it out and it works perfectly.So, a few tips for anyone else new to these kits: 1) The solder joints are quite small and need quite a small soldering iron or you risk melting adjacent joints. 2) If it isn’t stated in the instructions which polarity is which, it doesn’t matter. 3) When you have extra resistors left at the end that’s OK they’re spares? 4) At the end you will also have a 10µF capacitor, the speaker and two wires left over. These must be attached prior to fitting the LEDs ( or tubes as the instructions call them) the capacitor fits into position C0 and the wires into the marked SPK position. (Picture also posted)The clock setting instructions are a bit confusing so the following may help (at least they worked for me…)RESETButton one = TopButton two = Upper rightButton three = Lower rightPress button 1 and 2 for five secondsDisplay shows 7:59, then shows 8:00 after 5 secondsAdjustments (continuous cycle)TimePress button 2 (hour blinks)Press Button 3 to adjust hourPress button 2 again (minutes blink)Press Button 3 to adjust minutesAlarmPress button 2 (hour blinks)Press Button 3 to adjust hourPress button 2 again (minutes blink)Press Button 3 to adjust minutesAlarm activation settingPress button 2 (no change to digits)Press button 3 to light or un-light dot on LED 4 (on = active off = inactive)Hourly ChimePress button 2 (hour blinks)Press button 3 repeatedly to set start hourPress button 2 (minutes blink)Press button 3 repeatedly to set end time in hours (ie 21 = 9pm)Hourly Chime ActivationPress button 2 (no change to digits)Press button 3 to light or un-light dot on LED 3 (on = active off = inactive)ExitPress button 2Hope this helps and enjoy the kit.
M**W
Excellent project
Clock was simple to build and worked without any issues once complete, case fastening requires patience but does the job.
L**N
Hard manual
Hard to understand how it works ...to adjust the settings
G**S
Doesn’t work properly but it’s funny (see video).
The media could not be loaded. Case was broken which I managed to glue but it looks cheap, the talking time feature is amusing, whilst it does talk it just gives random times regardless of what the display says.
D**H
Pretty easy project
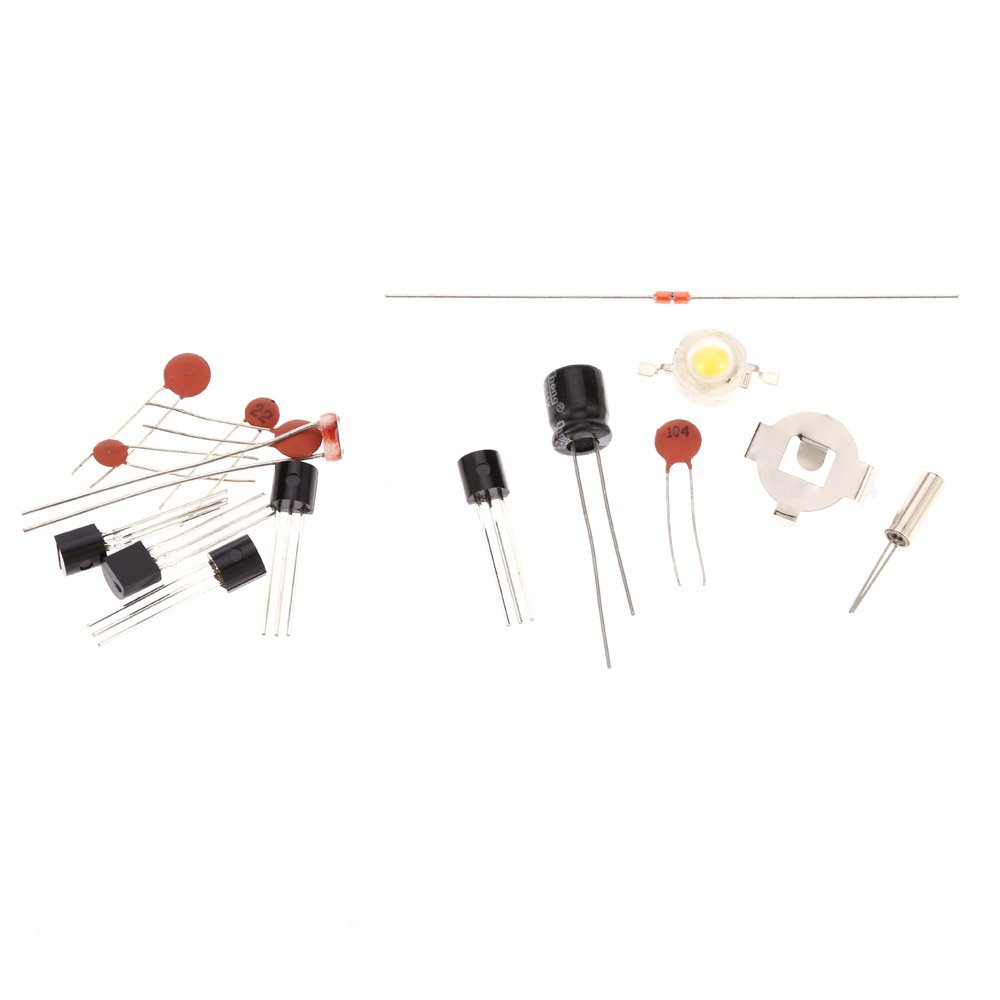
This kit is good but their are some minor points to note. First the setting instructions are in Chinese english but are decypherable. On construction, The coin cell needed is a CR1220 3v lithium. It is not clear on the downloaded instructions or from the paper with the kit. The good point is that there are two spare resistors one for each value supplied. The 7 segment LEDs are quite a tight fit on the pcb and may require bending their pins slightly to make them fit. The NY3PO3 voice chip may require gentle bending of the pins entering the DIL socket. Otherwise everything else is pretty straighforward. It worked first time.
Trustpilot
5 days ago
2 months ago
1 week ago
1 month ago