Desert Online General Trading LLC
Dubai, United Arab Emirates
Desert Online General Trading LLC
Dubai, United Arab Emirates


🔥 Shield your ride with the ultimate heatproof armor!
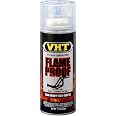
VHT SP115 Flameproof Coating is a clear satin finish, silicone ceramic-based spray paint designed to protect metal surfaces exposed to extreme intermittent temperatures up to 2000°F (1093°C). Widely used in automotive and aerospace industries, it offers fast drying, durable, matte protection for headers, exhaust systems, and piston domes, extending the life and performance of high-heat components.


| Brand | VHT |
| Color | Clear (Satin Finish) |
| Finish Type | Flat |
| Size | 11 Ounce (Pack of 1) |
| Item Volume | 11 Fluid Ounces |
| Special Feature | Flame Resistant |
| Unit Count | 11.0 Ounce |
| Paint Type | Silicone Ceramic |
| Specific Uses For Product | Interior |
| Surface Recommendation | Metal |
| Indoor/Outdoor Usage | Outdoor |
| Item Form | aerozol |
| Included Components | Can |
| Is Waterproof | False |
| Model Name | ESP115000 |
| Package Information | Can |
| Color Code | FFFFFF |
| Full Cure Time | 0.5 Hours |
| Coverage | Varies with product size |
| Water Resistance Level | Water Resistant |
| UPC | 010155001159 |
| Global Trade Identification Number | 00010155001159 |
| Manufacturer | VHT |
| Dry Time In Hours | 0.5 |
| Item Weight | 14.7 ounces |
| Product Dimensions | 1 x 1 x 1 inches |
| Item model number | ESP115000 |
| Is Discontinued By Manufacturer | No |
| Exterior | Silicone |
| Manufacturer Part Number | SP115 |
| OEM Part Number | SP115 |
| Special Features | Flame Resistant |
D**L
Works Great
Works Great
S**R
Fresh paint
Excellent paint
M**C
Looks good
Sprays easy, looks great.
A**S
Came out great
Used it on some headers, the paint didn't flake or change colors, came out great. I didn't use the clear coat as some people reported it turning yellow.The procedures I followed: (not exactly what the bottle said)I applied the VHT primer as it directed, except I used 4-5 light coats (instead of 2 lights and a thick). I waited the recommended times between coats and the time recommended before spray painting.I also applied the paint in 5 light coats instead of 2 lights and 1 thick.The bottle isn't clear as to what window you have before curing it, but from my research its fine if you prime + paint, and let sit for a few days before you begin curing (needed if curing on vehicle so that paint isn't too soft). What I did was prime and paint all on the same day, let cure for that remainder of the day and half of the next day in direct sun (so it got about 12 hours of direct sun in the high 80s ambient temp).I didn't have a good way to cure the headers off of the car so I did it on the car. I would not recommend using a heat gun to cure the parts as it will not pass enough heat through the headers to cure things evenly...perhaps on smaller items it will be great.Installation and curing on vehicle:I wrapped the headers in plastic wrap to prevent scratching, oils, greases, filths from collecting on them. I then installed them, removed the wrapping and began curing by:-Turning engine on for 30 seconds and let sit for 5 minutes (repeated this about 4 times)-Turning engine on for 1 minute, let sit for 5-2 minutes heat, 10 minute sit-I then worked my way up in the time I let the engine run, and the time I let it sit up to the 20 minutes idle and 20 minutes cooling.-I stopped curing once the paint stopped giving off fumesIf you are painting motorcycle exhaust tubes, it might be a good idea to follow the above curing procedures as from what I read, the paint is more prone to lifting/burning off/changing colors on motorcycles if you followed the procedures in the bottle, probably because the exhaust tube temp is brought up more quickly than on a car?UPDATE after 1 year of using: Paint is still holding on my cars headers, and I've just painted some exhaust tips for my motorcycle, followed the oven curing process instructions on the bottle, but did it on the grill. Paint didn't peel or anything.
J**J
No mixing ball? Or stuck? Send it
Got the paint, rattle the ratsh-t out of it for over the span of 2 days without a mixing ball.Said to heck with it since I'd like to wrap up my project and only need the paint and primer to function as a sealant of sorts.I used Rustoleum 2000F Primer and cured once at 250F, once at 400F and twice at 450F (my oven doesnt go up to the recommended 600F)The primers finish came out great, I received this can of VHT and after deciding to just "send it" despite the lack of mixing ball, off I went.I made sure to shake up the paint as good as I possibly can to give it (and myself) the best shot. I was expecting dribbly nozzle action. The can worked as normal, the spray pattern and atomization seemed unaffected (keep in mind I shook the hell out of it for at least 3 collective hours).I cured this the exact same as I cured the primer. The finish was pretty good except for a few spots where I may have oversprayed a little bit, only very slight miniscule bubbles on one or two areas. I let it cure again at 450F which seemed to harden up those bubbles a little more so I figured it was fairly well cured.Lots of off-gassing smoking when curing, do not do this indoors. I expect more smoke when the car is started.Other than missing a mixing ball, which the rustoleum primer definitely had, I guess the product speaks for itself.This part is completely hidden in the engine bay, this was just to help the 40 year old iron with heat dissipation and to possibly prevent a surface crack from spreading. The paint was used for it's utility and not aesthetics so I suppose it's not a bad deal.Shipping was awful, but again a fault on my part since I didn't bother to check local stores. Almost a week coast to coast.
R**O
Good Stuff
It is not the first time I am buying and using this High Temp Paint spray, either Flat Black or Glossy Black.It is relatively expensive and it provides good results on hot surfaces: it depends very much of the kind of the surface and the preparation work being done before the application.In my opinion, it provides longer durability when applied over a cast iron part (ex: exhaust manifold) than o a new exhaust pipe or muffler -- it will start to flake after several months, in particular off the aluminized or factory painted (exhaust) parts.On older exhaust parts, I had better luck after removing the surface rust and cleaning with good brake cleaner.Painted over the exhaust wrap... mixed results. It the wrap is in areas that are some more exposed to whatever flies under the vehicle, the paint and (later) the wrap is not going to last long, as they are not quite abrasion resistant.Otherwise: read and follow the instruction.
A**.
-Great for exhaust parts- Follow the process- and it will be GREAT!
Color is FLAT black- if you rub it with some microfiber it will barely shine.wanted the chrome pieces black on my bike.These were polished chrome . I used the strongest stuff I could think of to degrease.First step , paint thinnerStep 2 - sand with 400 gritStep 3 - rub with 91% isopropylStep 4 - good rub down wit Brake CleanerStep 5 - wear gloves from now on- the grease on your greasy paws will ruin steps 1-4Step 6 - paint per directionsStep 7 - and this one is KEY- bake per directions.I used the grill with some foil over the burners.
Z**N
Perfect!
Great paint! Bought 2 cans and had almost a whole can leftover after painting my 2 headers. Takes 2 coats, looks matte and great!
Trustpilot
5 days ago
3 weeks ago
1 week ago
4 days ago